Part 2 - Connect desktop phones
To help you to understand the mechanism behind the Ozeki PBX, we made a simplified scheme(Figure 1) about our product. As you can see, the two phones which you are to connect are communicating directly with the Ozeki 10 PBX on a computer, which can commuicate with a VoIP Service Provider through a Global network, like Internet.
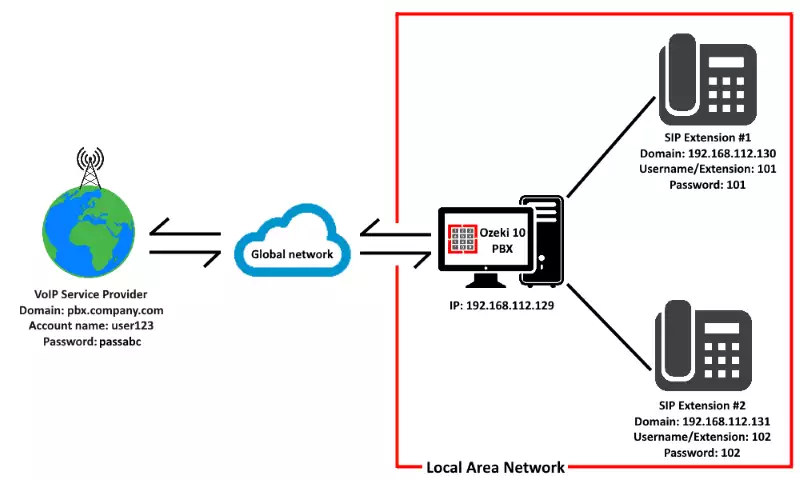
To make the scheme work in the real world, we made you this tutorial video.
Here, you will see:
Video tutorial - Setup two SIP phones as extensions and call one from the other.
Requirements:

|
VoIP Gateway:The VoIP Gateway will be the way through to the public telephone network and also to your phone system. The gateway needs a SIM Card to be inserted into it. |

|
VoIP Service Subscription: The VoIP service provider is responsible for connecting your local phone system to the global network using VoIP technology. The VoIP service subscription comes with an username, a password and an IP address that will be the address of the gateway which will broadcast your calls to or from the public network. |

|
SIM Card:The SIM card (Subscriber Identity Module card) is a portable memory chip that used in GSM devices. It identifies and stores the telephone number that the device can use which has been the SIM card plugged in. |

|
Switch: The Switch creates the connection between the SIP telephones, VoIP Gateway and the PBX. The Switch can also receive data from the public network and redirect it to the connected devices. |

|
SIP Telephone(s): To build up your own phone system you need SIP phones. This technology uses Internet Protocol to communicate, and to be the part of the phone system you have to connect them to the local network via the Switch. |

|
Ozeki 10: The Phone System application can be found in Ozeki 10. You can download
Ozeki 10 from here |
And finally, here is a step-by-step tutorial for you to make sure that you succeed at implementing our product into your business:
Connect two desktop VoIP phones to your Phone System
Step 1: Setup the network
To create the phone system, first of all, you have to create your local network that contains the SIP telephones. As you can see in Figure 2, you need to have a UTP cable and an AC-DC adapter for each SIP telephones.
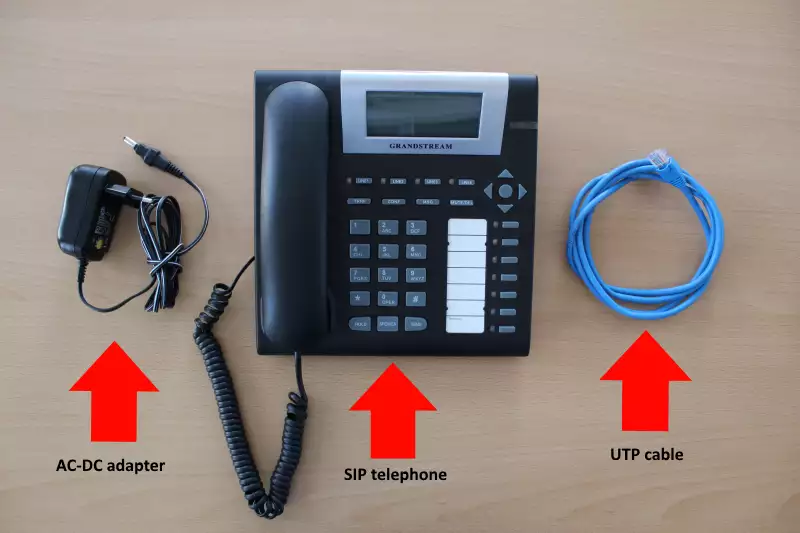
Next, you need to connect the telephone to the switch. You can easily do that with the UTP cable. You just need to plug the cable into the LAN port of the telephone, and with the other end of that cable, you need to connect to the switch as Figure 3 shows. To power on the telephones, you just have to plug the AC-DC adapter into the phone and connect it to a power strip.

Step 2: Open Ozeki 10 Phone System application
After you logged in, you will be able to see the desktop of Ozeki 10 in your web browser. There are many useful applications in the system, but now, as Figure 4 shows that you need to open the Phone System app by clicking on the icon of it.

Step 3: Create your first phone extension
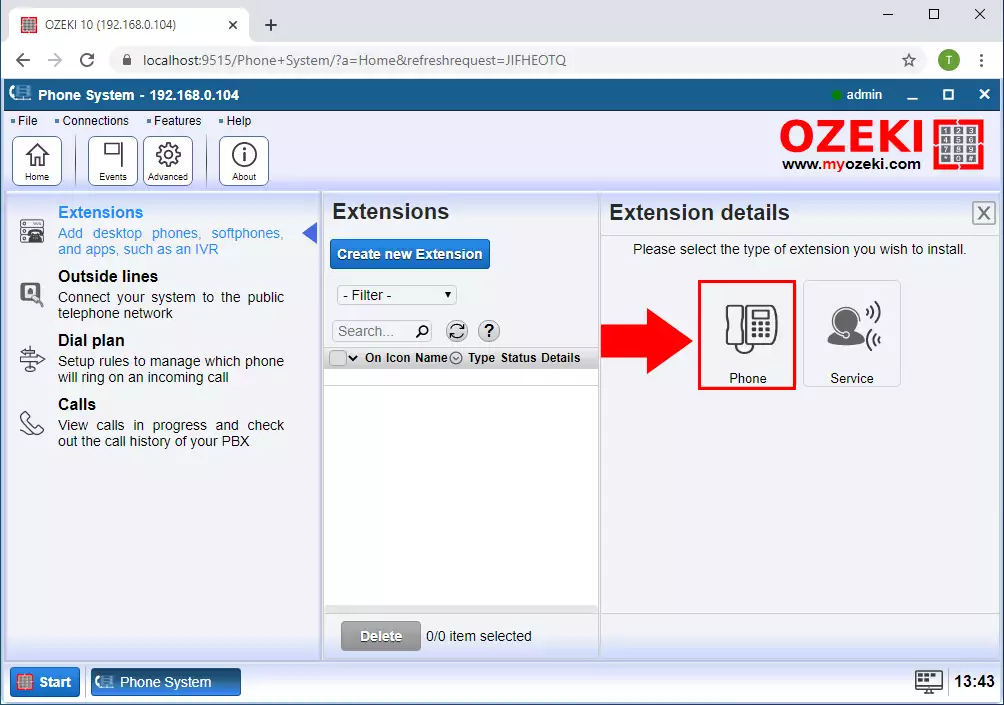
The main feature of a phone system is of course, the phones that you connect to it. In Ozeki 10 PBX you can connect the phones from your local network in just a few mouse clicks. So first, as Figure 5 shows for you below, you have to click on "Extensions", then on "Create new Extension"(Figure 5) button. and lastly in the Extension details panel, you need to select the "Phone"(Figure 6) option.

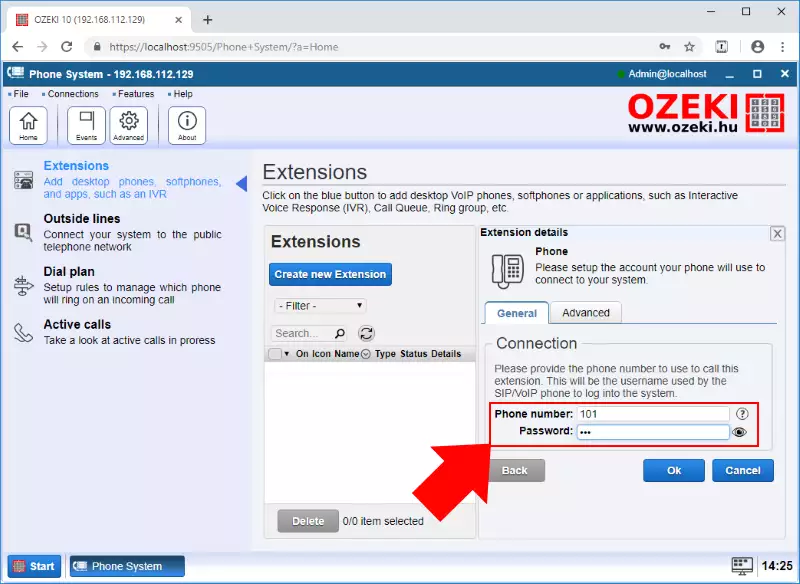
Next, you need to specify the details of the phone extension. These details are Phone number and Password (Figure 7). To the phone number field, you need to enter the extension number that you will have to call inside the phone system to reach that particular SIP phone. This number will also function as a username with you can log in to the phone system on the SIP telephone. The Password field will be used also for the login process.
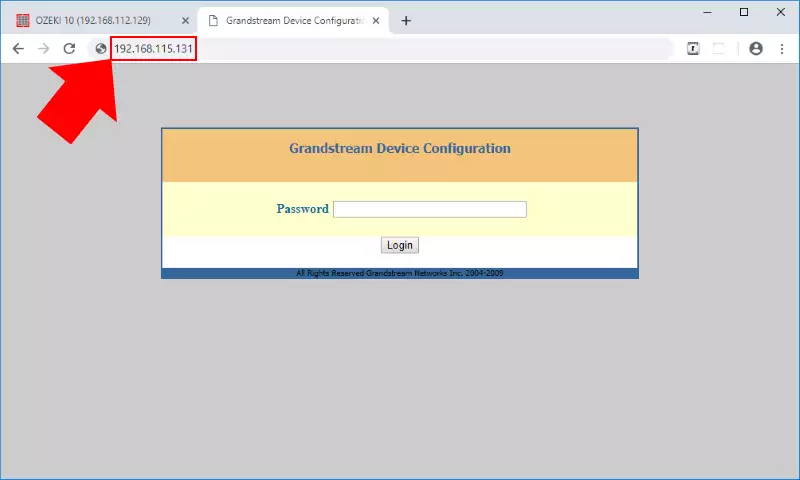
After you created the extension in Ozeki 10 PBX, you need to configure the SIP telephone as well to store these changes. For that, you need to type the IP address of the phone into your web browser, that you can see on the phone's dashboard (Figure 8). Here you need to log in to the configuration menu as Figure 9 shows. By default the password is 'admin'.

Next, select Account 1 (Figure 10), and enter the details, that you provided for the extension in Ozeki 10. As the SIP Server and Outbound Proxy, you have to enter your computer's IP address, and to the Authenticate Password just type the same password as it was when you created the Ozeki 10 phone extension.

When you finished with the entering of the details, just scroll down to the bottom of this page, and click Update. When you do that, your phone starts to reboot as you can see in Figure 11.

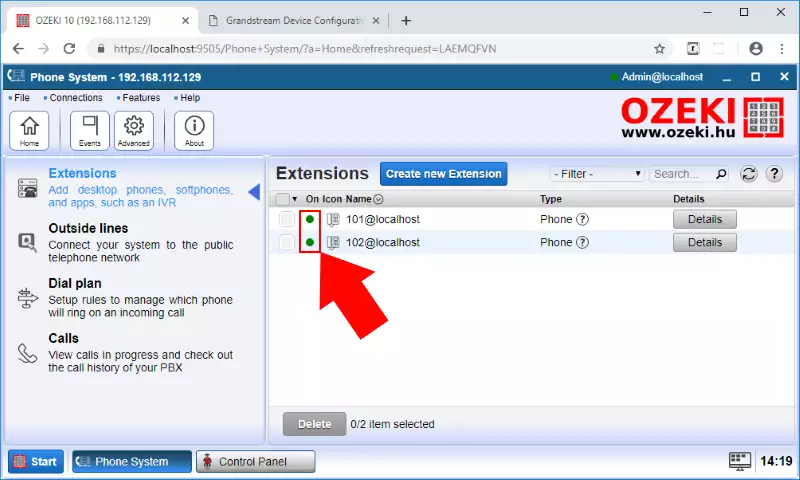
When it finished with the rebooting process, now the telephone will be registered to the phone system. You can easily check that, because the connection indicator turns green in the phone system application. in Ozeki 10 (Figure 12).
Step 4: Make a test call
After you created the extensions, that you needed to your phone system, now they are ready to call each other. Calling another extension in your phone system is pretty straightforward (Figure 13), you just need to type the phone number of the extension and start the call.

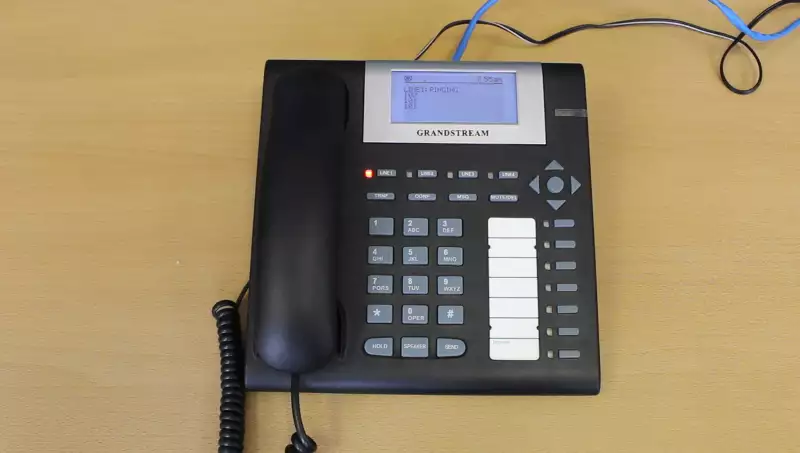
If your phone system works correctly, in the meantime, you can see the call request on the dashboard of the extension that you called (Figure 14). That means, the extension can answer the call and start a conversation in your system.
If you want to learn about how to connect your Phone System to the public telephone network, feel free to follow the Part 3 of this guide.
