Part 4 - Create an Interactive Voice Response (IVR) extension
Step 1: Create an IVR service extension
Interactive Voice Response (IVR): If you have not met with this technology here is a little description of how it works. With this feature the caller can interact with the computer using voice or simply with the keypad on the telephone. The system uses prerecorded or generated audio to answer the requests. The IVR can handle a large number of phone calls where only simple interactions are required.
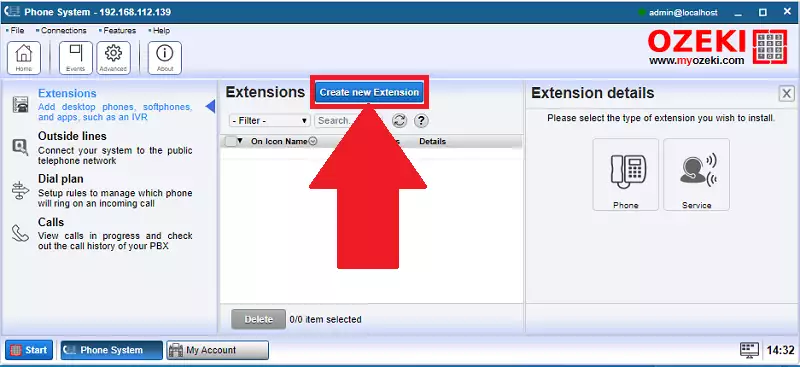
To create an IVR extension in your PBX, just select the Extensions menu in the Phone System application, click on Create new Extension and from the extension types now select the Service option as Figure 1 and Figure 2 demonstrates it.
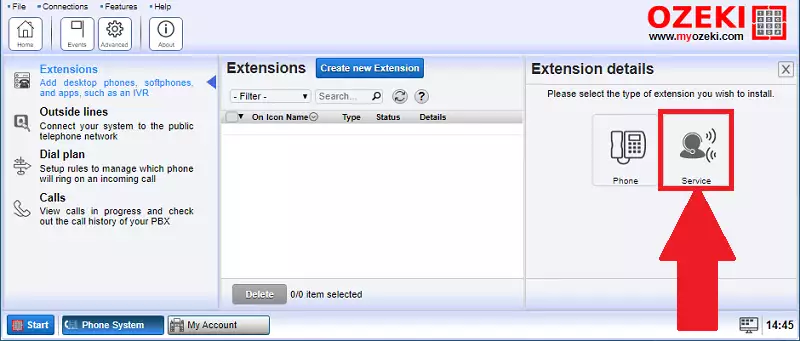
At this point, you will be able to see all the service extensions that Ozeki 10 provides you. These extensions also ensure great features to use, but now in this guide you will create an IVR extension, so like in Figure 2, click on its icon.

Next, you need to enter the telephone number of the phone extension which will have the IVR functionality and type the OzML script which will be executed in case of an incoming call (Figure 3). OzML is an programming language that handles the IVR. You can edit the script at the creation, but now you can just click on OK, and you will create your first OzML script in the next step.

Step 2: Setup your IVR extension
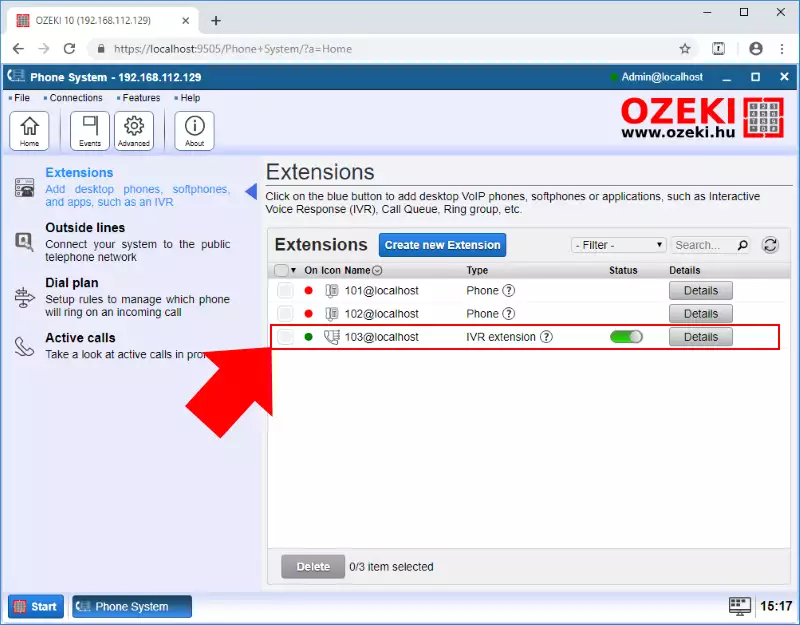
When you created the IVR extension it appears in the list of extensions. If you want to edit the properties of the extension, or in this case, rewrite the OzML script of it, just click on the created extension as you can see in Figure 4.
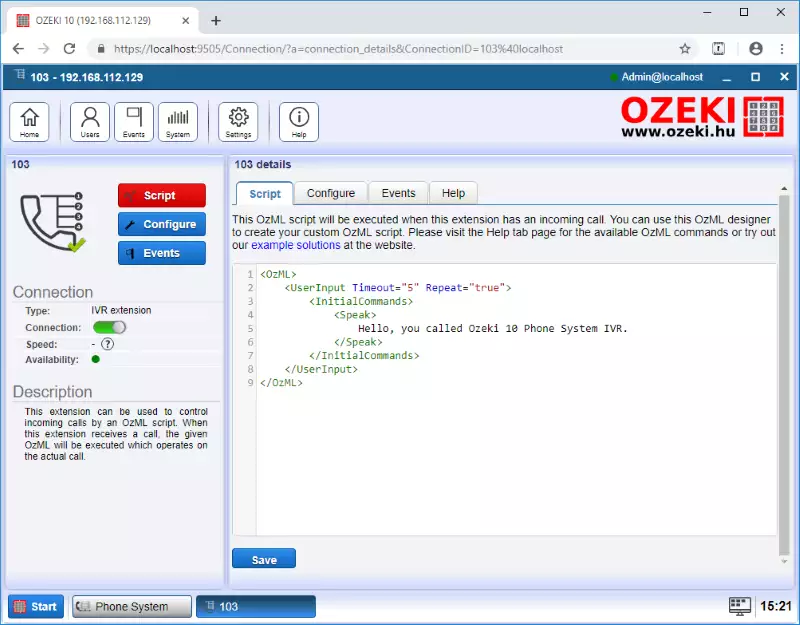
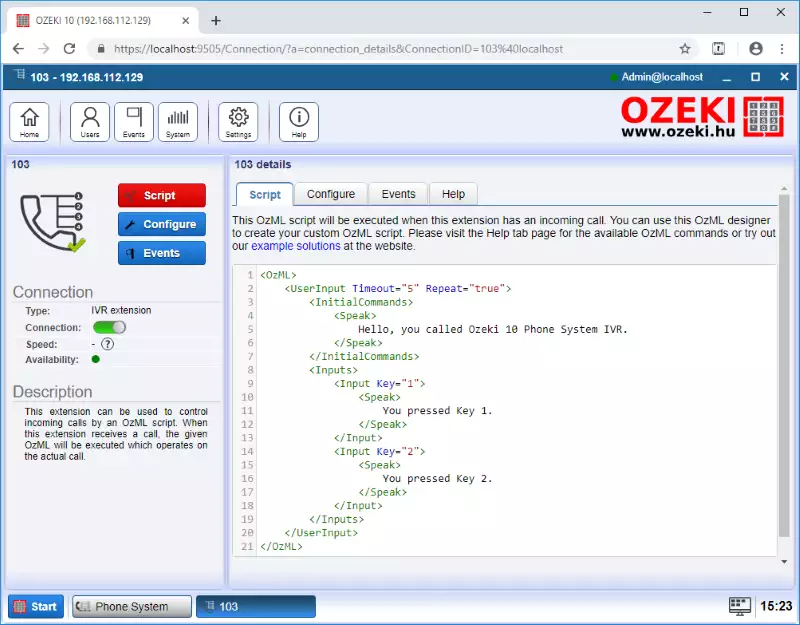
After you opened the extension, on the Script panel you can write your OzML script. The Figure 35 shows you a simple OzML script that will be described now. Every command in the script must be between <OzML> and the </OzML> tags. Only these command will be executed. <UserInput Timeout="5" Repeat="true"> command means that everything will be repeated with the delay of five seconds and also scans for user inputs. The <InitialCommands> tag ensures you the opportunity to run commands at the very start of the interaction. This example greets the user with the <Speak> tags, which use text to speech technology to read out the text between the tags.
After the initial greeting, now let's see, how can you handle the inputs. You can do that between the <Inputs> and </Inputs> tags. Here you need to list all the key presses that you would like to handle. Like in Figure 6 in the <Input> tag you can specify the key with the Key attribute. Everything within this tag will be executed only if the correct button was pressed. In that case the text 'You pressed Key 1' will only be read out if the user pressed key number 1 on the phone.
We hope that this guide was helpfull to you. We also hope that with our software you could make your bussiness more efficient!
