How to setup your SSL cert in Ozeki 10
The following document provides some useful information about how you can setup your SSL certificate in Ozeki 10. By setting the certificate, you will be able to open your Ozeki 10 safely from anywhere. The document contains a step-by-step guide that describes every action that you have to perform to successfully set up the solution. Each step is visually demonstrated by a screenshot for the better understanding. It does not take more than ten minutes to complete the guide, so let's start right now!
Step 1 - Open Security app
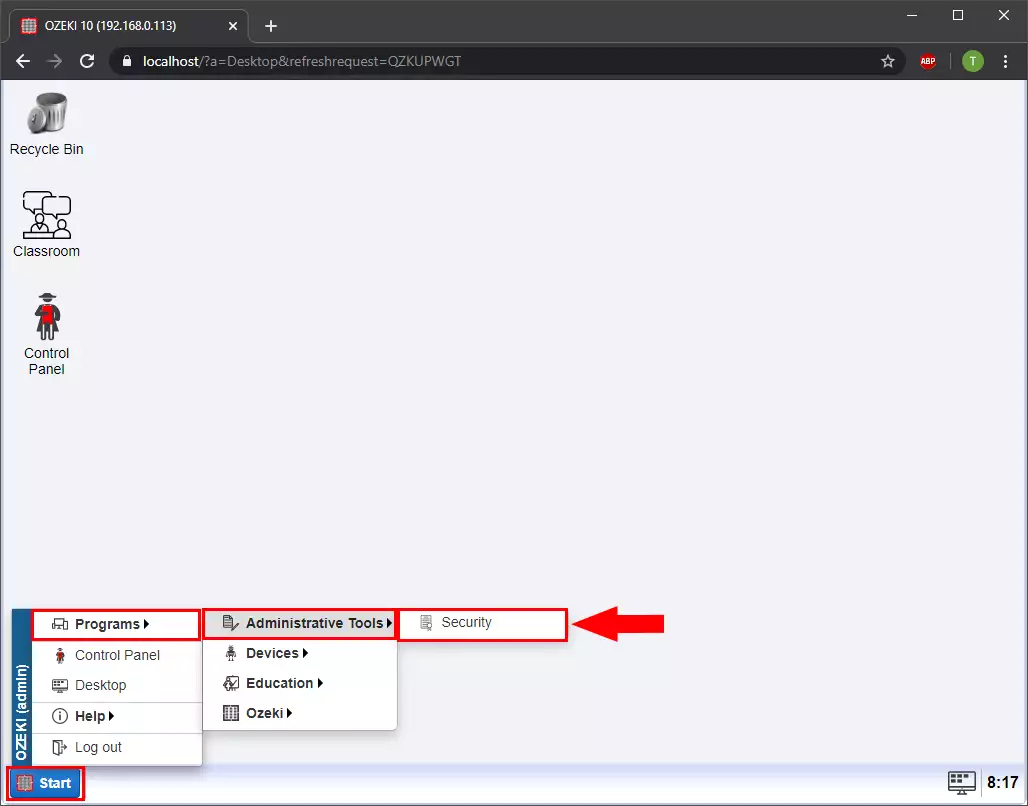
Since Ozeki uses 10 PFX format certificates, the first step is to convert the previously generated certificate to PFX. But don’t worry in Ozeki 10 this can be easily done. Just open the Security app under the Start menu, Programs, Administrative Tools as Figure 1 demonstrates it below.
Step 2 - Select Convert tab
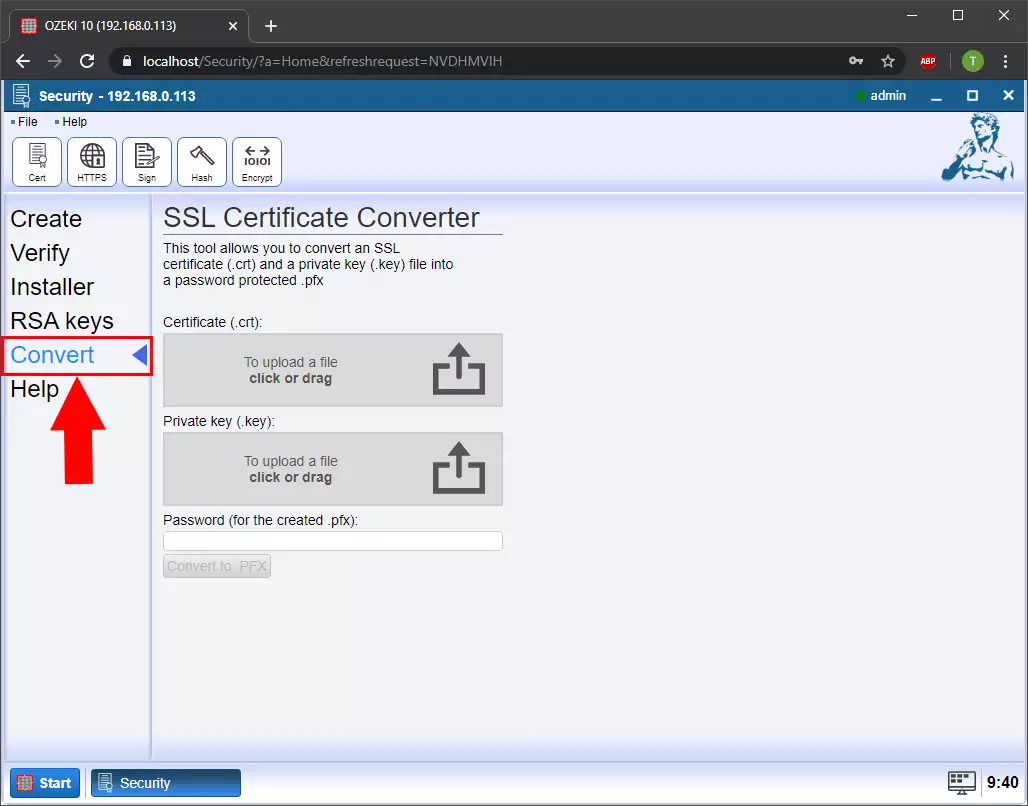
Next, the main menu of the Security application shows up. This application ensures that you can create and manage certifications or sign them as well. At this point, you need to select the Convert submenu, so as you can see it in Figure 2, just click on the name of this menu.
Step 3 - Upload certificate files
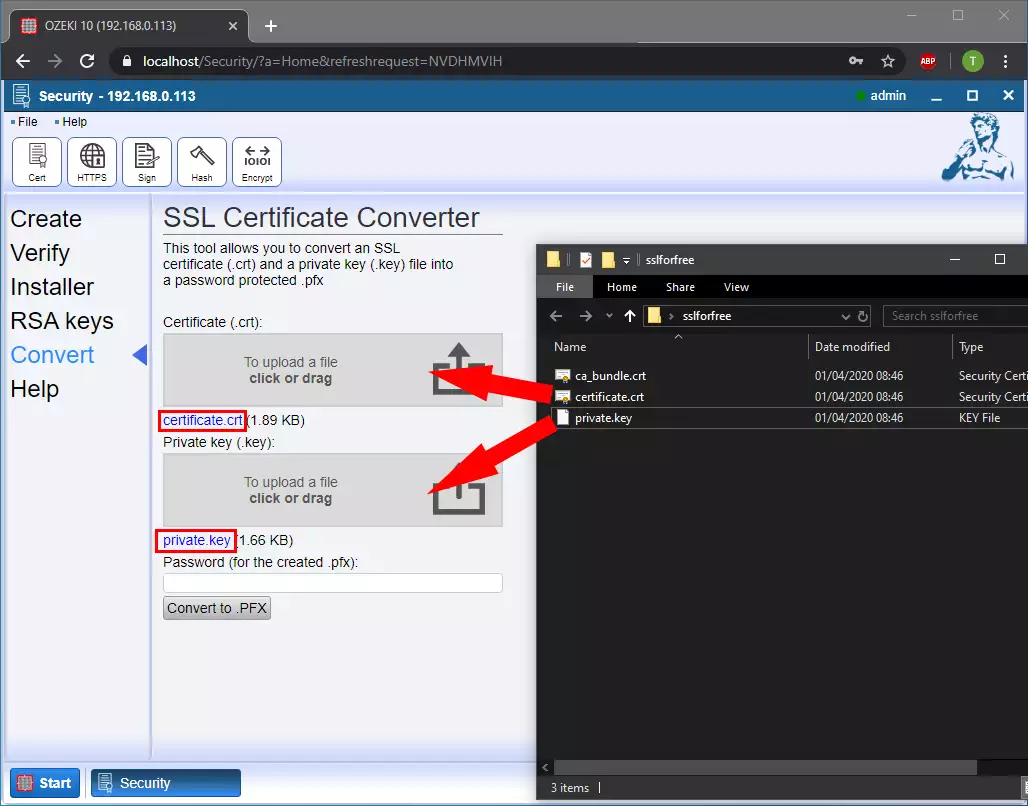
This Convert menu is the place where you can convert your certificate to a password protected .pfx file. This operation is needed to use your certificate in Ozeki 10. The conversion of the files is quite simple, first, you need to drag and drop the certificate and the private key files as Figure 3 shows that.
Step 4 - Add Password
Next, you need to provide a password for the certificate. This password will protect the private key that you uploaded with the certificate as well. After that, you will be able to use the converted .pfx file only in case you give the password as well. So, just enter a password as Figure 4 demonstrates that.

Step 5 - Convert and download the PFX file
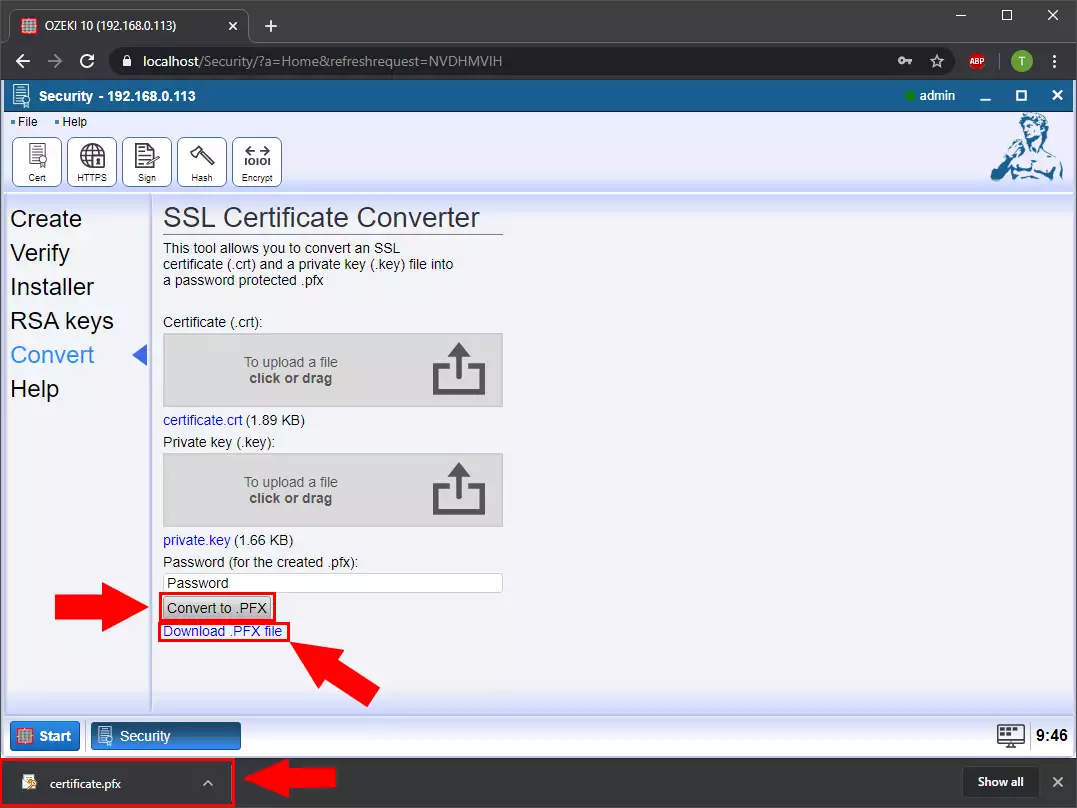
After you uploaded your certificate and private key files and then, you provided a password as well, now, you can simply convert them to a .pfx file. For that, you just need to click on the 'Convert to .PFX' button like in Figure 5. As soon as the conversion finishes, you will be able to see a new button below, which is the 'Download .PFX file' button. This button makes it possible to download the converted file to your computer. So, just go ahead, and click on this download button.
Step 6 - Open Control Panel
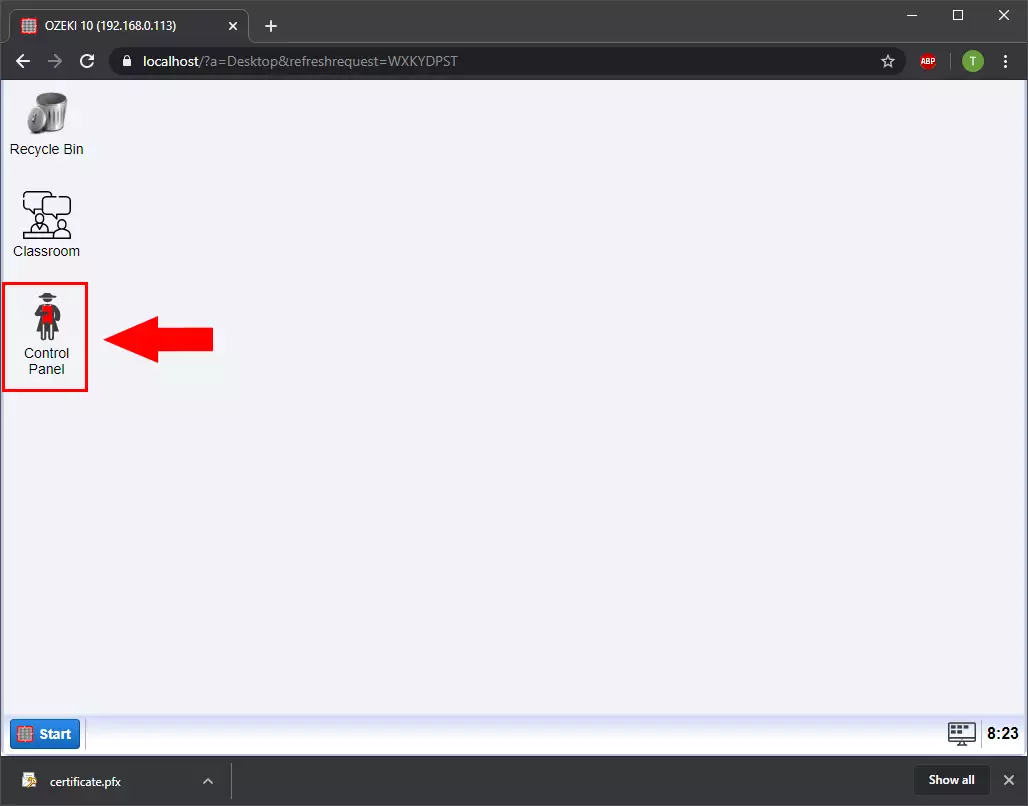
The next main operation of this guide is to activate the converted .pfx certificate in Ozeki 10. To do that, first, you need to open the Control Panel application in Ozeki 10. So, just navigate back to the desktop of Ozeki 10, and here, as you can see it in Figure 6, just open Control Panel by clicking on its icon.
Step 7 - Select the Setting menu in Control Panel
The Control Panel is the application, where you can configure your connections and the main settings of your Ozeki 10. At this point, to activate the converted .pfx certificate, you need to go to the Settings menu. So, to do that, please click on the icon of the Settings menu on the toolbar like in Figure 7.

Step 8 - Open Webserver Advanced menu
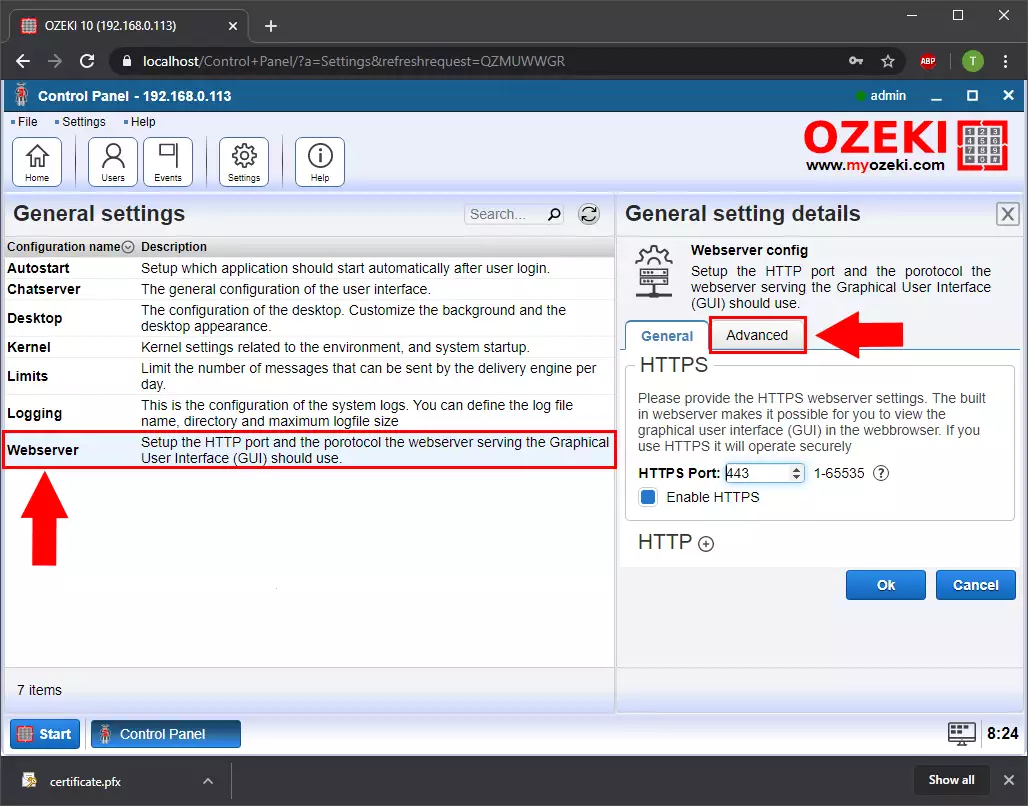
Here, in the Settings menu, you can see all the configuration submenus, where you can make modifications. Now, you need to select the 'Webserver' menu from that list. After you selected the 'Webserver' menu, a new window pops up, where you can perform the configuration. To be able to upload the converted certificate, here, select the Advanced tab as Figure 8 shows that.
Step 9 - Upload PFX for the Webserver
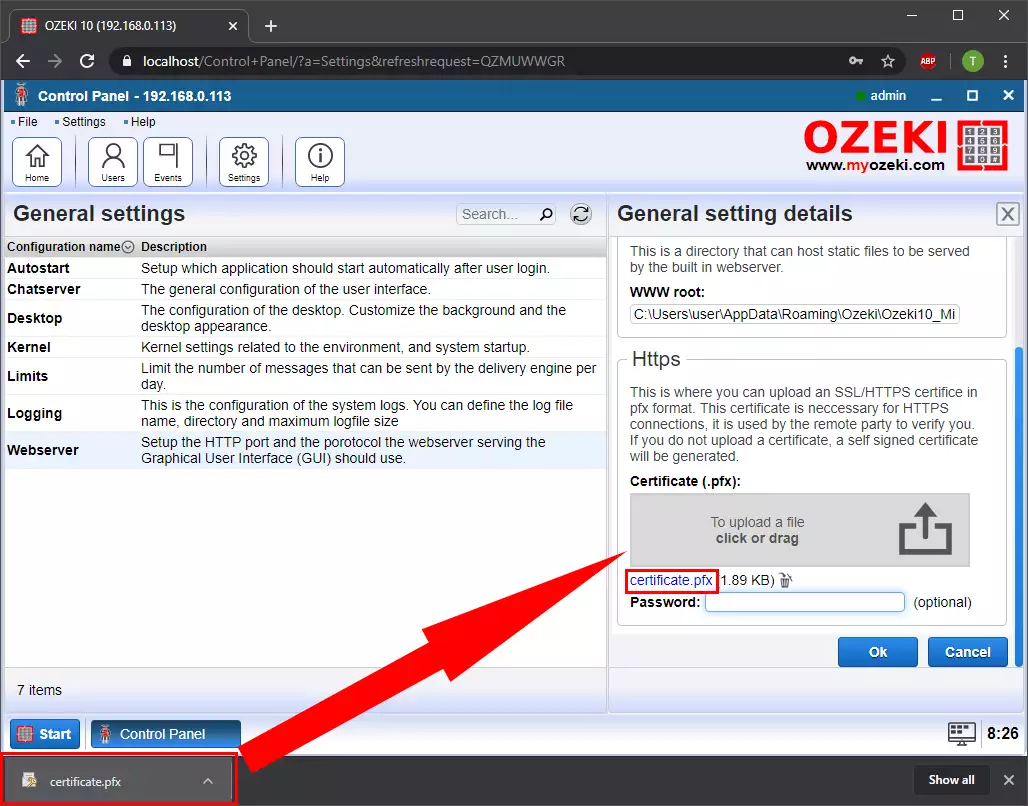
In the Advanced menu, you can upload the .pfx file that you converted in the previous steps. It is quite easy to upload the certificate, since you can browse the file after clicking on the upload field or simply drag and drop the certificate file as you can see it in Figure 9.
Step 10 - Type Password
Before finalizing the upload of the converted PFX certificate, you need to type the password of the certificate as well. This is the password that you had to provide when you converted the certificate. So, just type it in the field like in Figure 10, and finally, just click on OK.

Step 11 - Open Windows Services
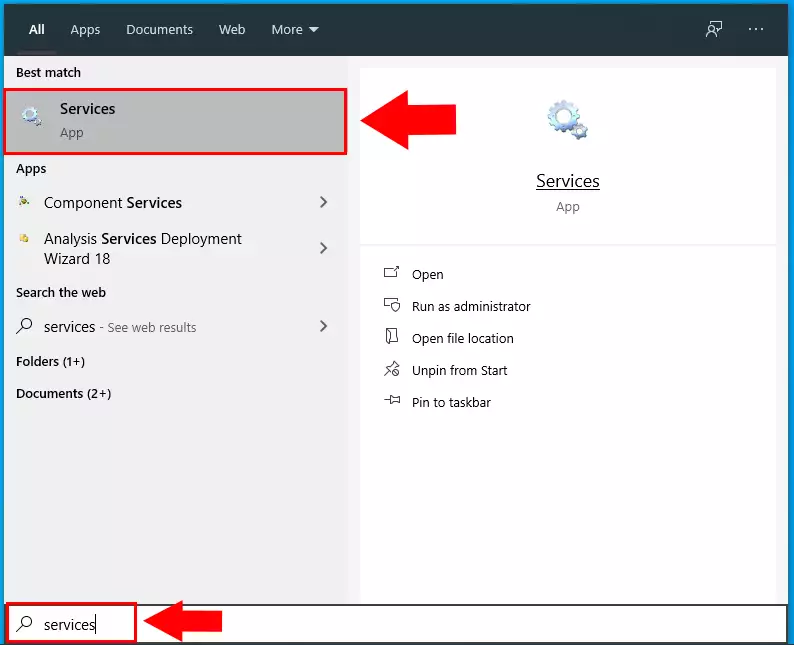
At this point, you uploaded the PFX certificate to your Ozeki 10, but to be able to use it, you need to restart the Ozeki service. You can restart the service quite easily. For that, first, you need to open the Services application on your computer. To do this, type 'services' to the search field on your taskbar as Figure 11 shows that, and when the Services application appears, just click on it to start.
Step 12 - Restart Ozeki Service
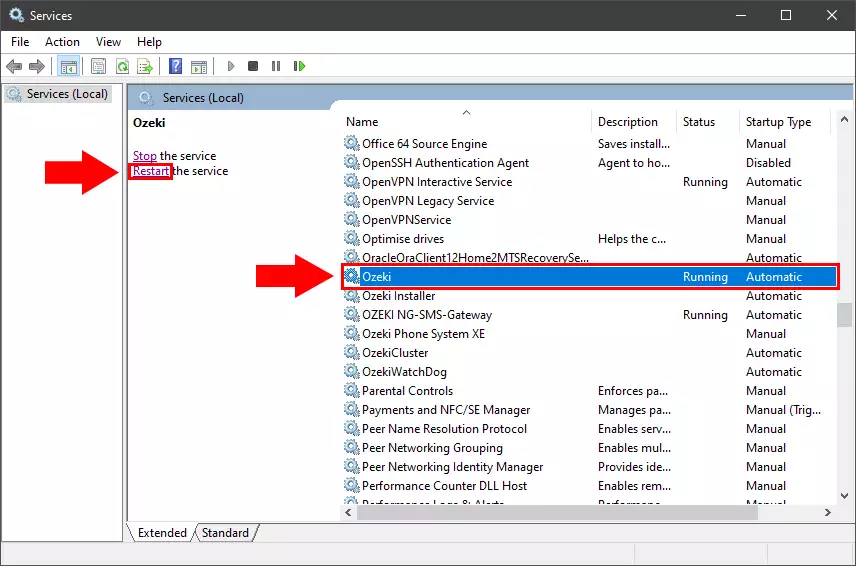
In the Services application you can see every service that runs on your computer. Here, in that list, you need to find the Ozeki service. When you found it, select it by clicking on it like in Figure 12. Then, you need to click on the 'Restart' button to restart the service. This operation takes a few seconds, but after that, it restarts with the installed certificate.
Step 13 - Open the Ozeki 10 safely
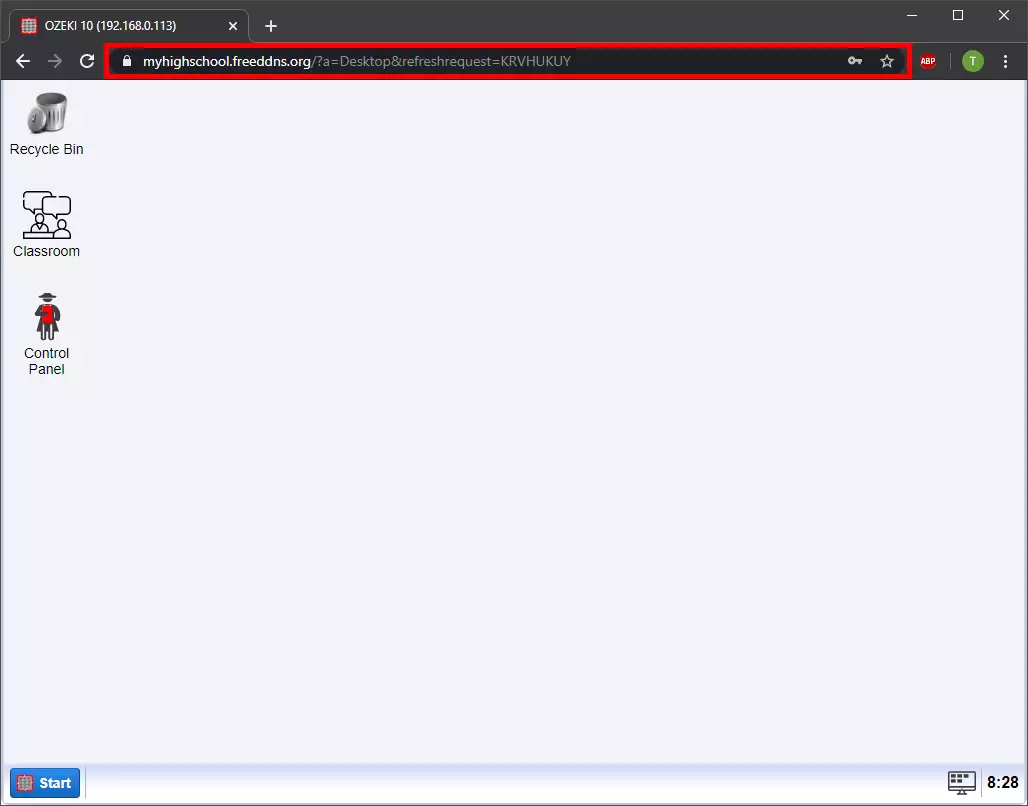
After you restarted the Ozeki service, now it is ready to use Ozeki 10 from anywhere with the connected domain name. Figure 13 demonstrates that the Ozeki 10 started not from the localhost but using the connected domain name.
