How to use the Ozeki Web SMS service
This guide takes you through the step by step process of using the Ozeki Web SMS service at myozeki.com to send SMS messages through your Android mobile phone. Using and Android mobile to connect to the mobile network is a fast and efficient way to get started with SMS marketing and SMS notifications for your business.
Step 1 - Register a myozeki.com account
In this short, easy-to-follow video guide, we are going to demonstrate how to register a new account on myozeki.com. You can learn all the vital steps when it comes to registering an account, from filling out the registration form to setting up security question. These are essential first steps to start you ozeki experience.
Registering a myozeki.com account (Step-by-step guide)
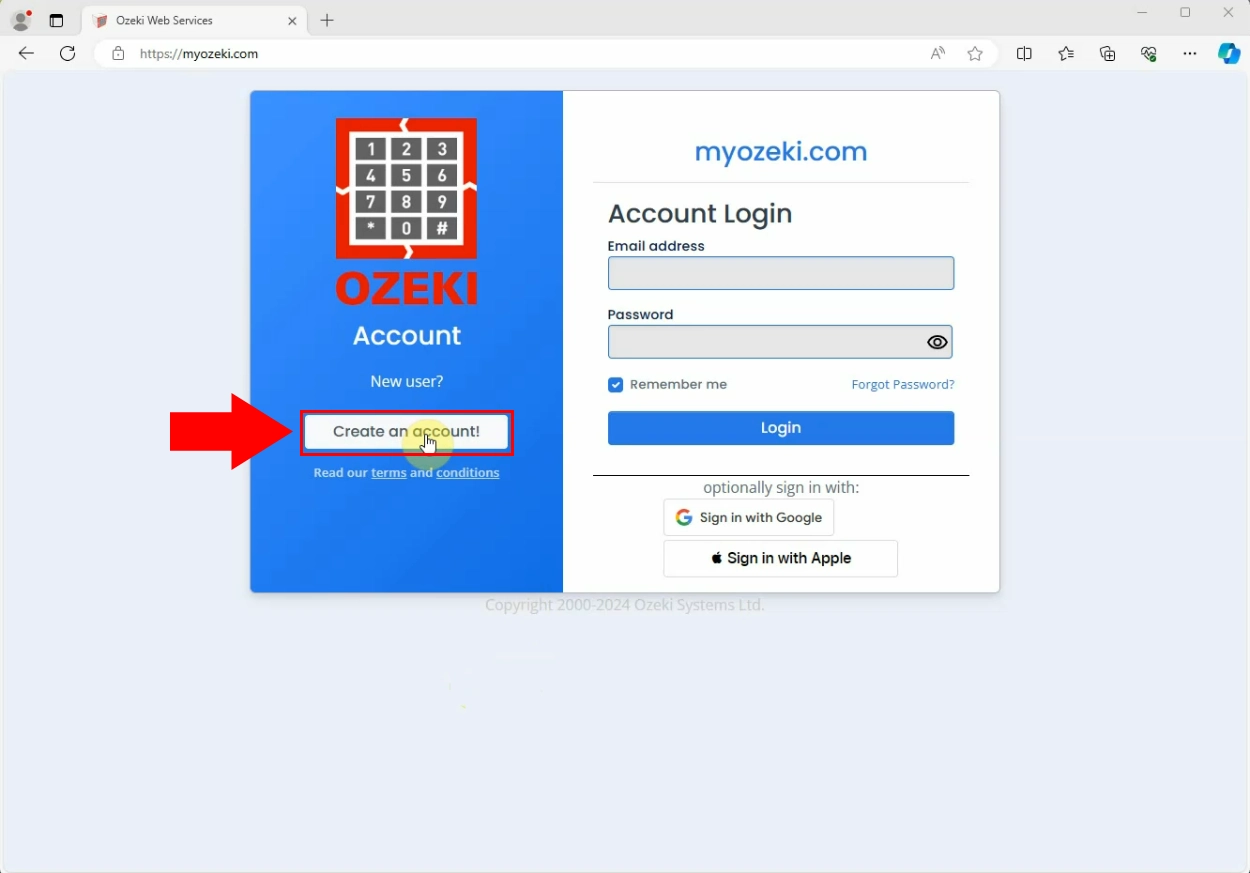
To begin the whole process, the very first thing you need to is browse the myozeki.com website. Once it is loaded you need to click on the 'Create an account' sign as show in Figure 1.
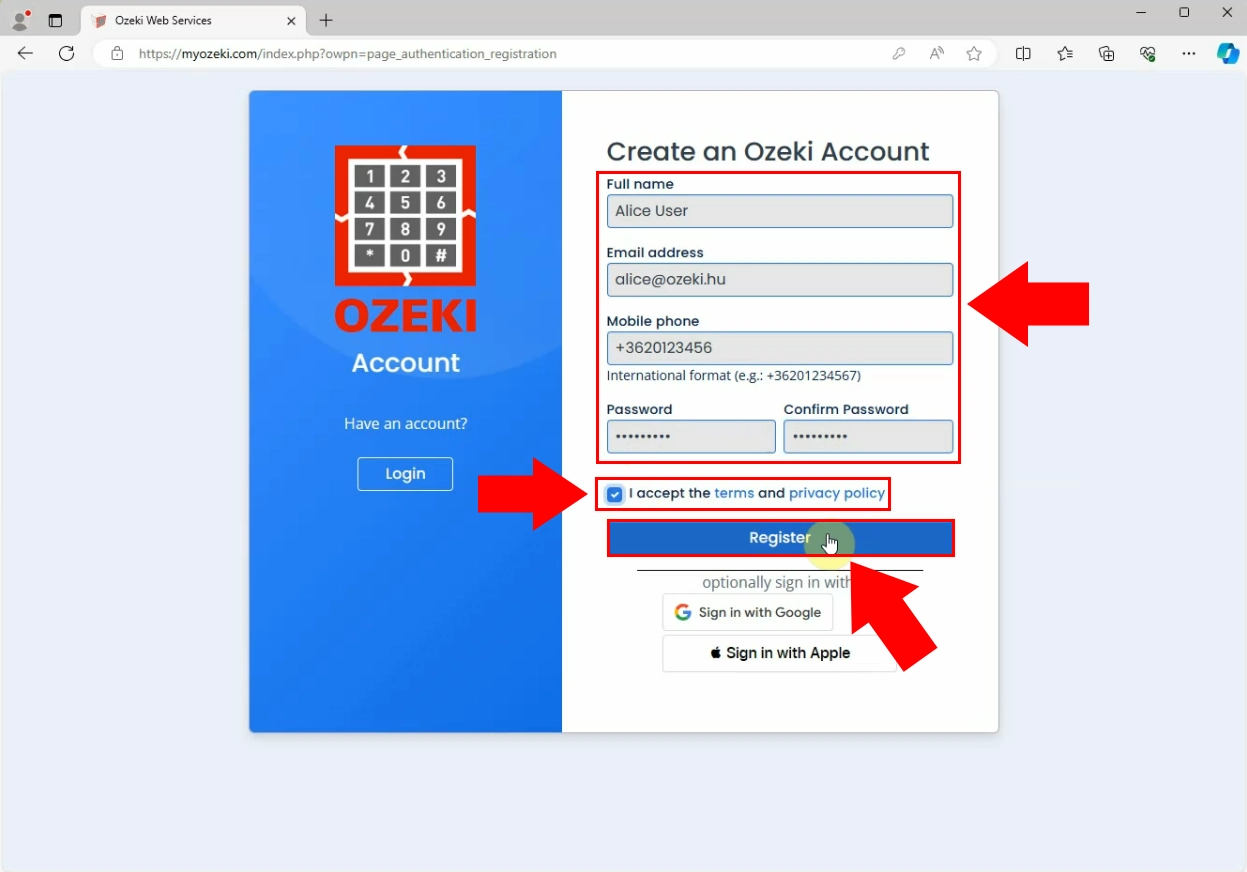
Now, you need to fill out the registration form. Start with entering your full name, then provide your e-mail address, your phone number and a password. Do not forget to type the phone number in international format. Make sure you accept our terms and privacy policy. When you feel like you are ready, do a quick overview to make sure everything is spellt and provided properly. Lastly, as it is represented in Figure 2, click on the blue 'Register' sign.
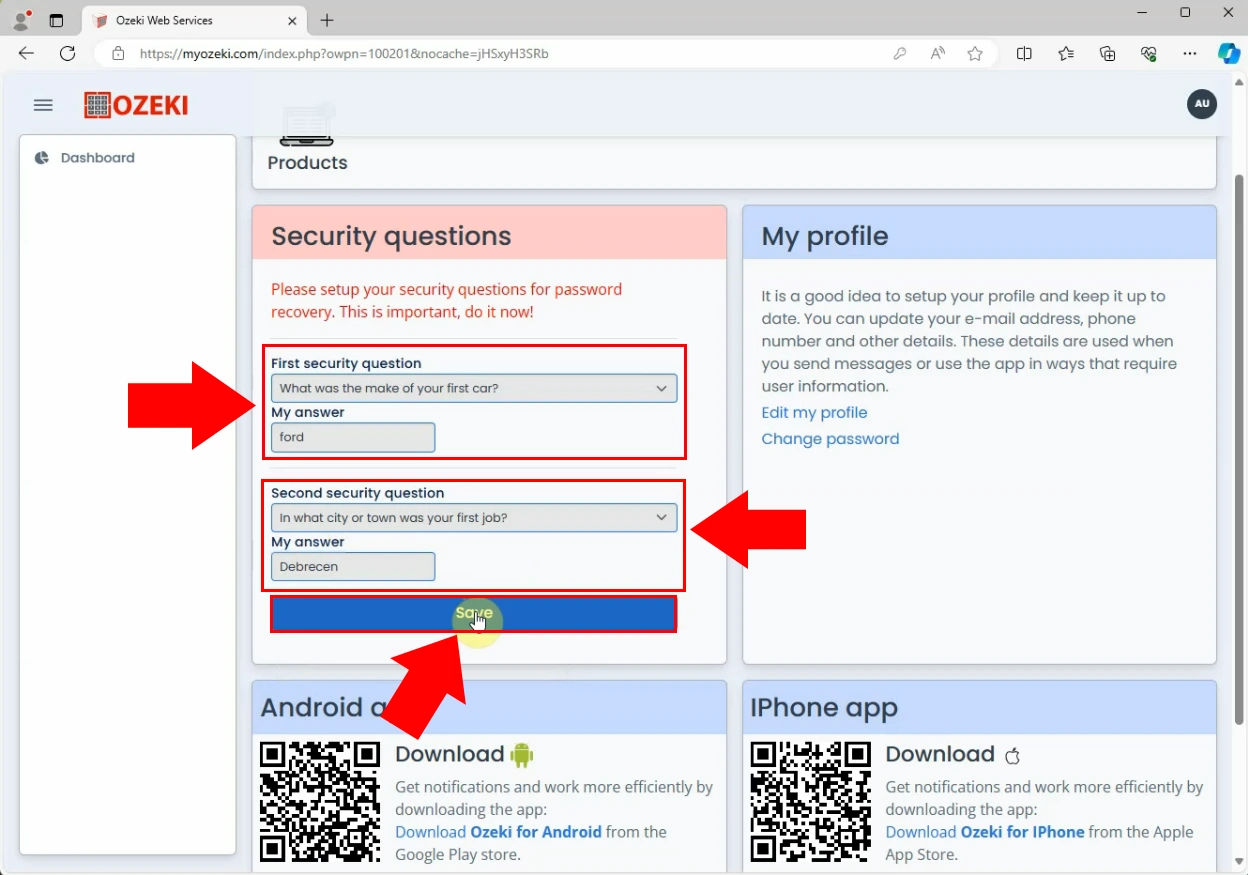
Once you inside of your newly registered account, you need to set up the security questions. You have to set up two security questions. In both cases you have to choose the question from the drop-down-list. Make sure you select questions that you actually know the answers to and will not forget them. Enter the answers into the proper textboxes. Click on the 'Save' sign once everything is in order just like in Figure 3.
Step 2 - Install the SMS service
In this video tutorial we are will continue the demonstration of using the Ozeki web SMS service. This step will cover how to install the SMS Service. By the end of the video you will know how to install the SMS service, and how to add a mobile.
Installing the SMS service (Step-by-step guide)
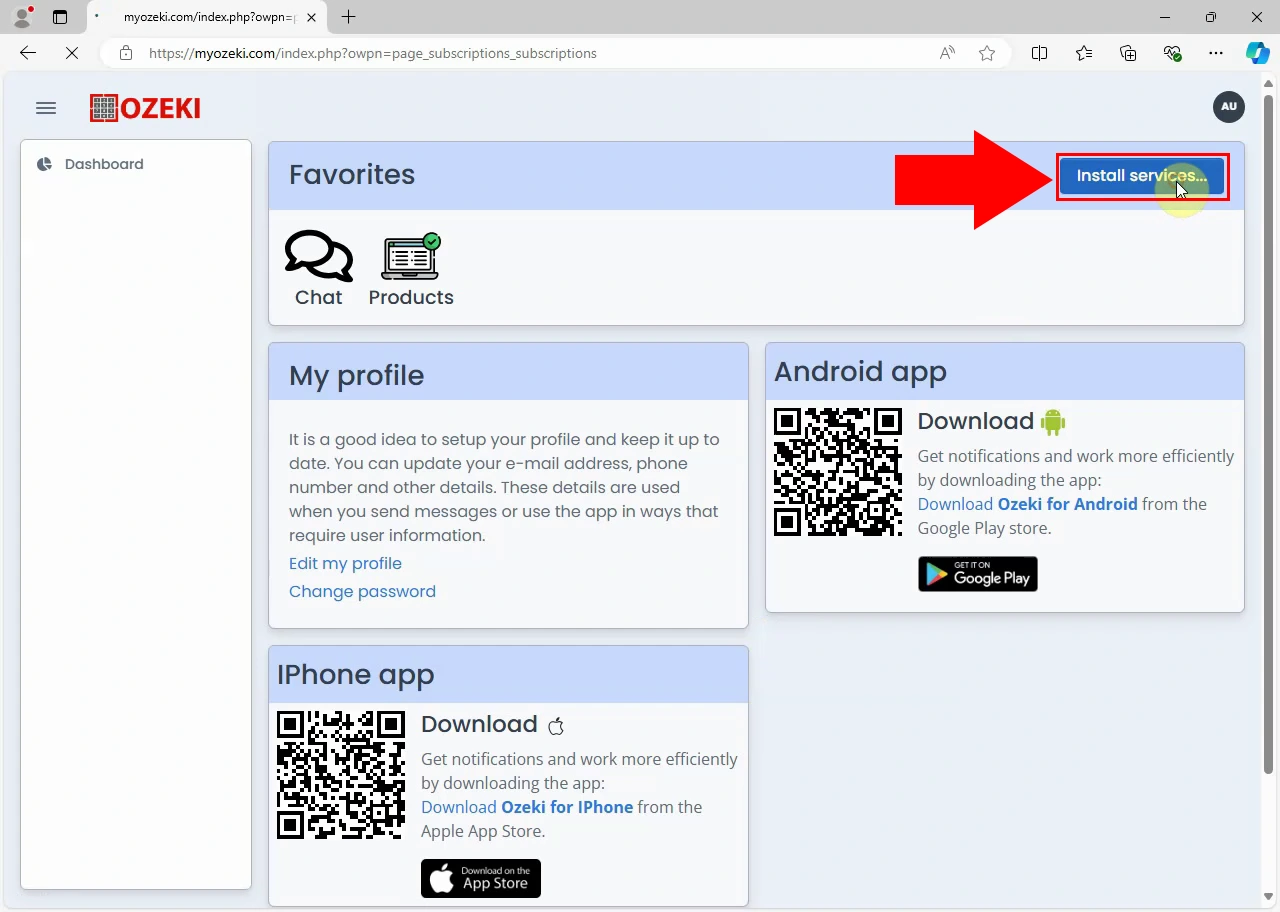
On the homepage of your myozeki.com account, you need to navigate to the upper right corner. You have to click on the blue 'Install services...' sign as shown in Figure 4.
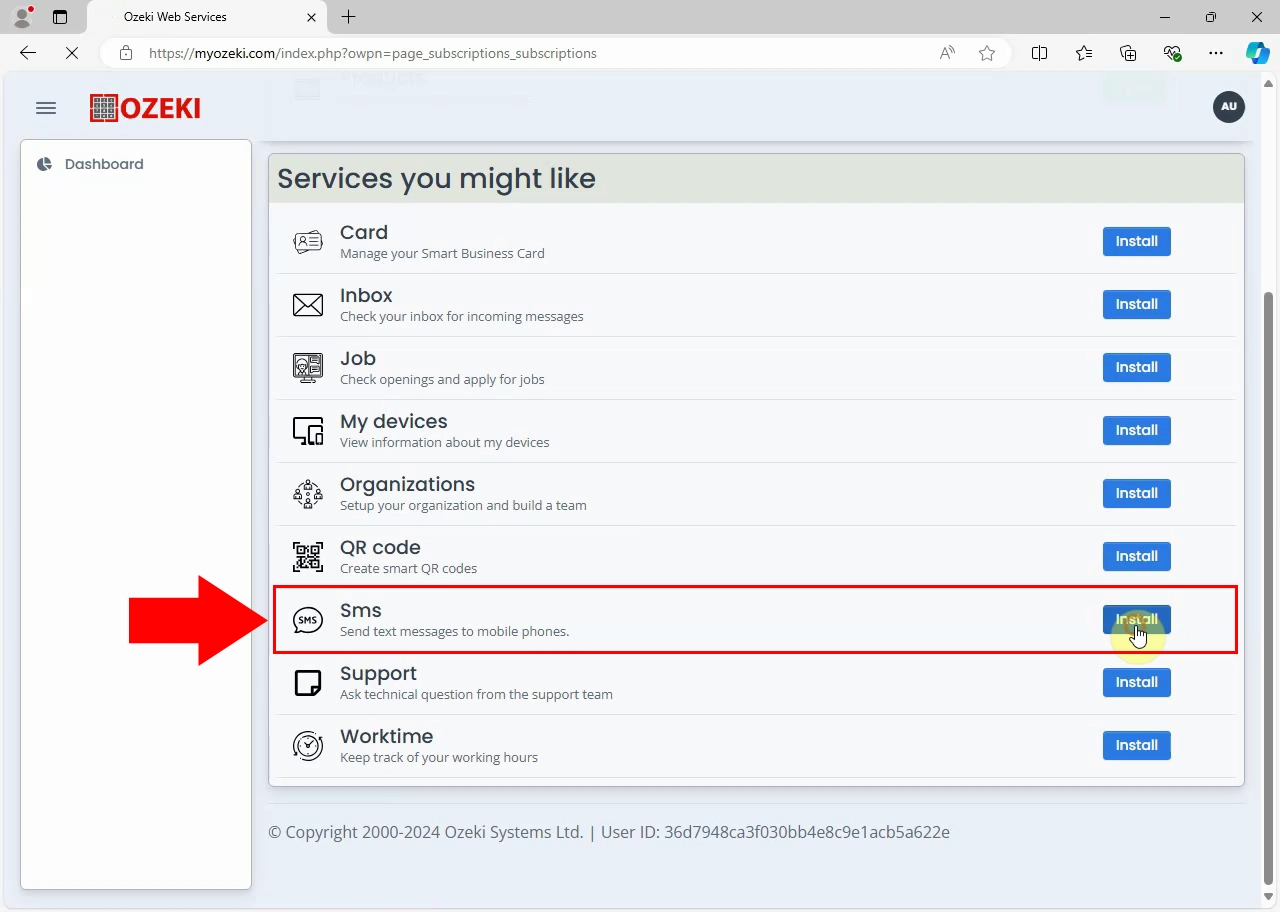
You will be directed to a site where you can view your already installed services, and the services that you might like to install. As you can see in Figure 5 you need to locate the SMS service, and click on the blue 'Install' button next to it.
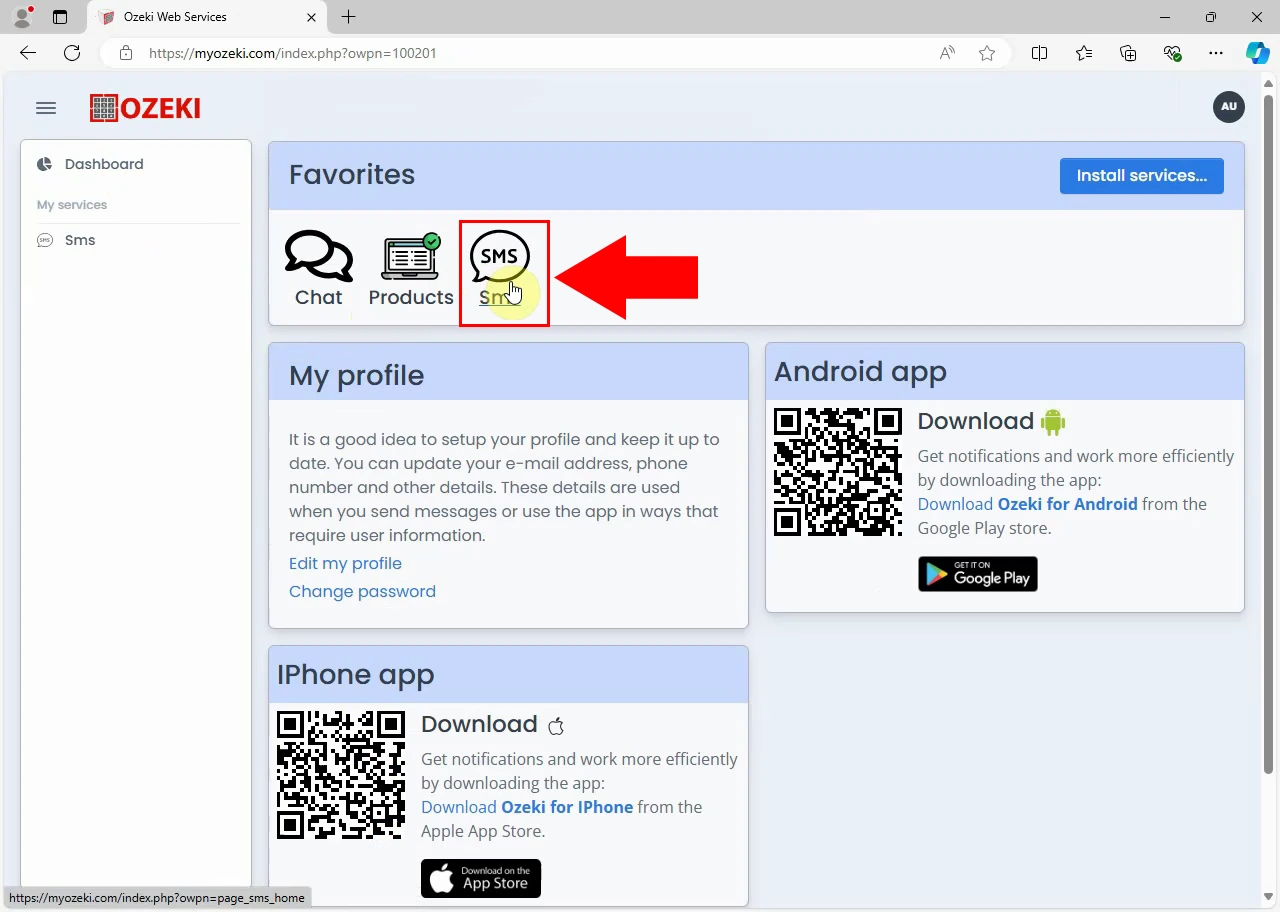
When you return to the dashboard, you will see the recently installed SMS service among your 'Favorites'. As demonstrated in Figure 6, click on its icon to open the service.
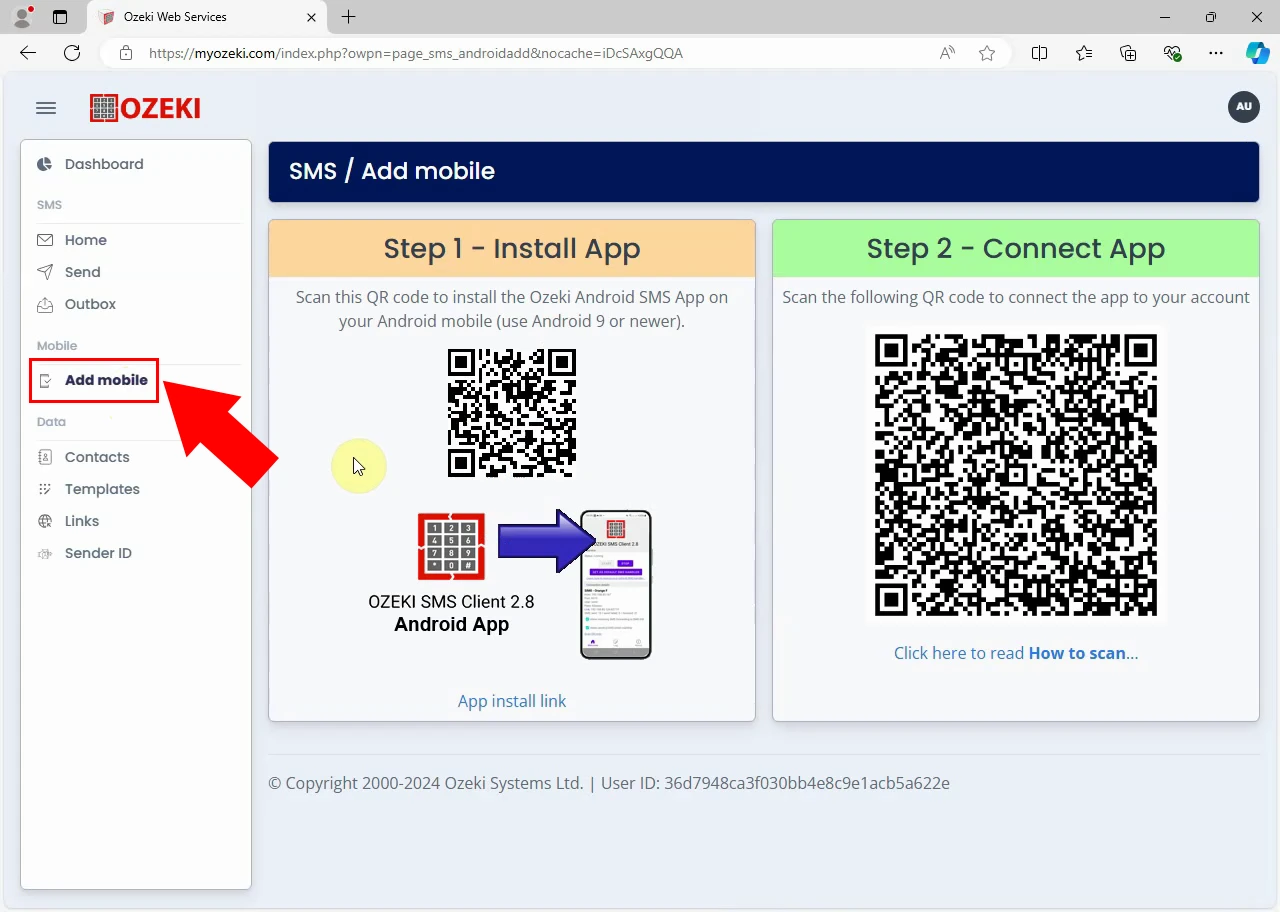
As you can see in Figure 7, opening the service will take you to a page where you add a mobile phone. From the left panel, choose the 'Mobile' option by clicking on it.
Step 3 - Connect your Android mobile
This video is representing the vital steps you need to take to be able to connect your Android device to the SMS service. The guide will show you everything you need to know, from scanning the QR code to successfully adding the mobile to the SMS service.

Connecting you Android mobile (Step-by-step guide)
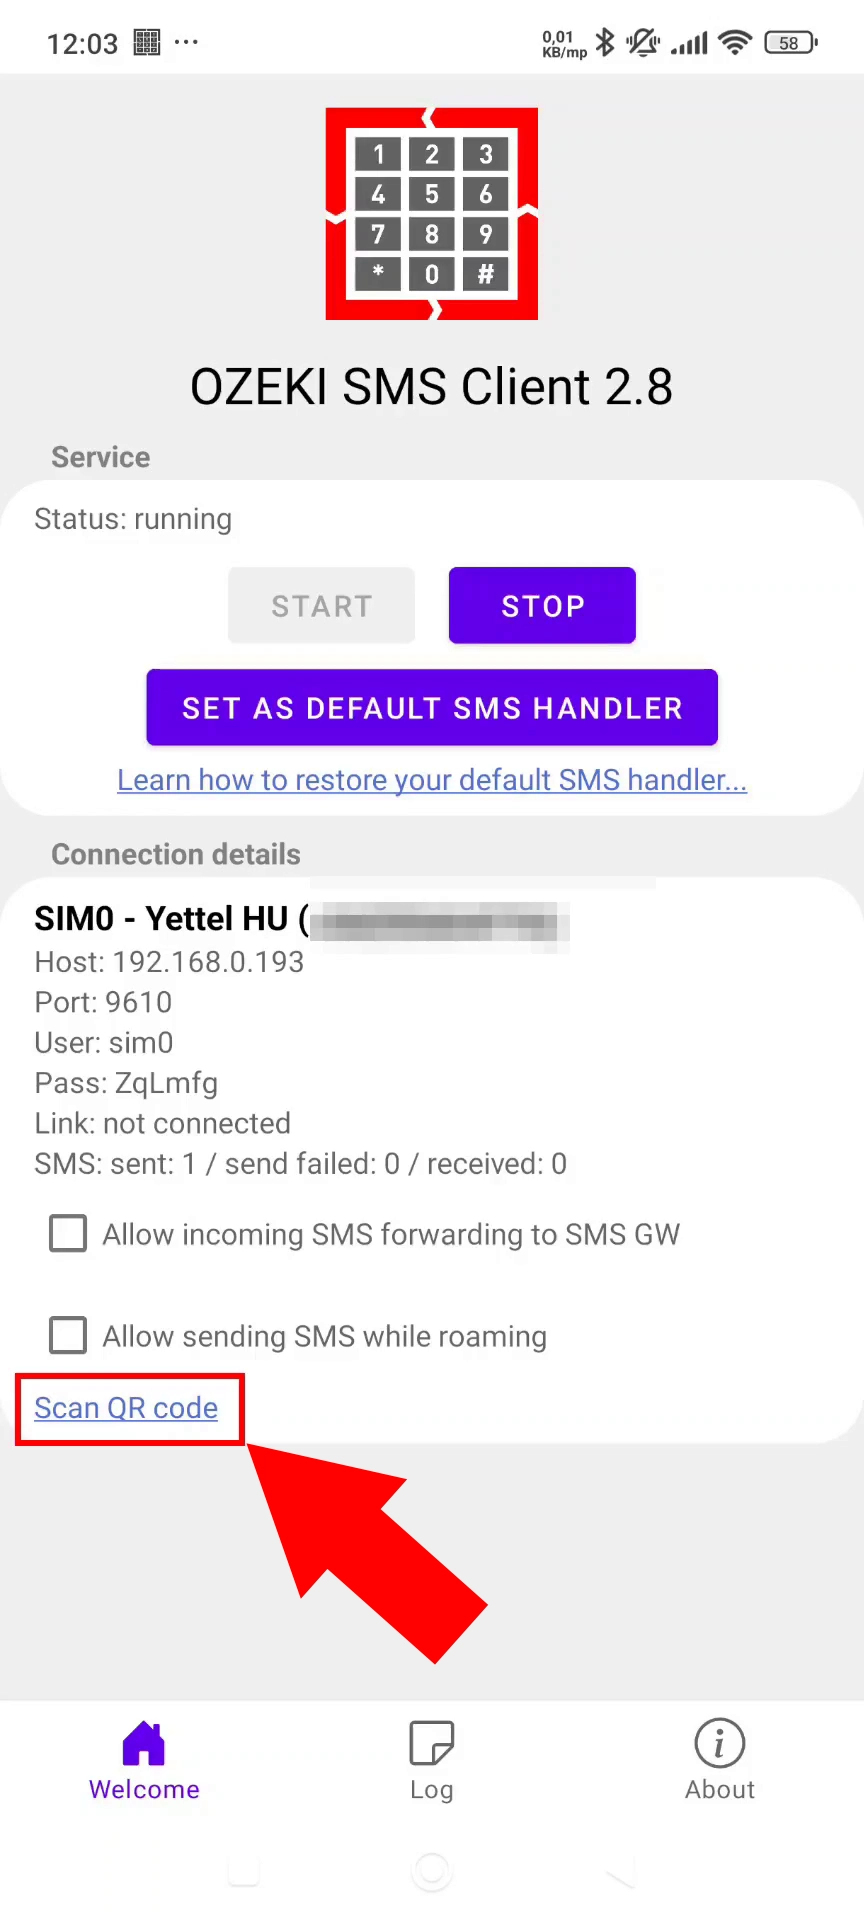
First thing first, open the Ozeki Client application on your mobile phone. Tap on the 'Scan QR code' option, shown by the arrow in Figure 8.

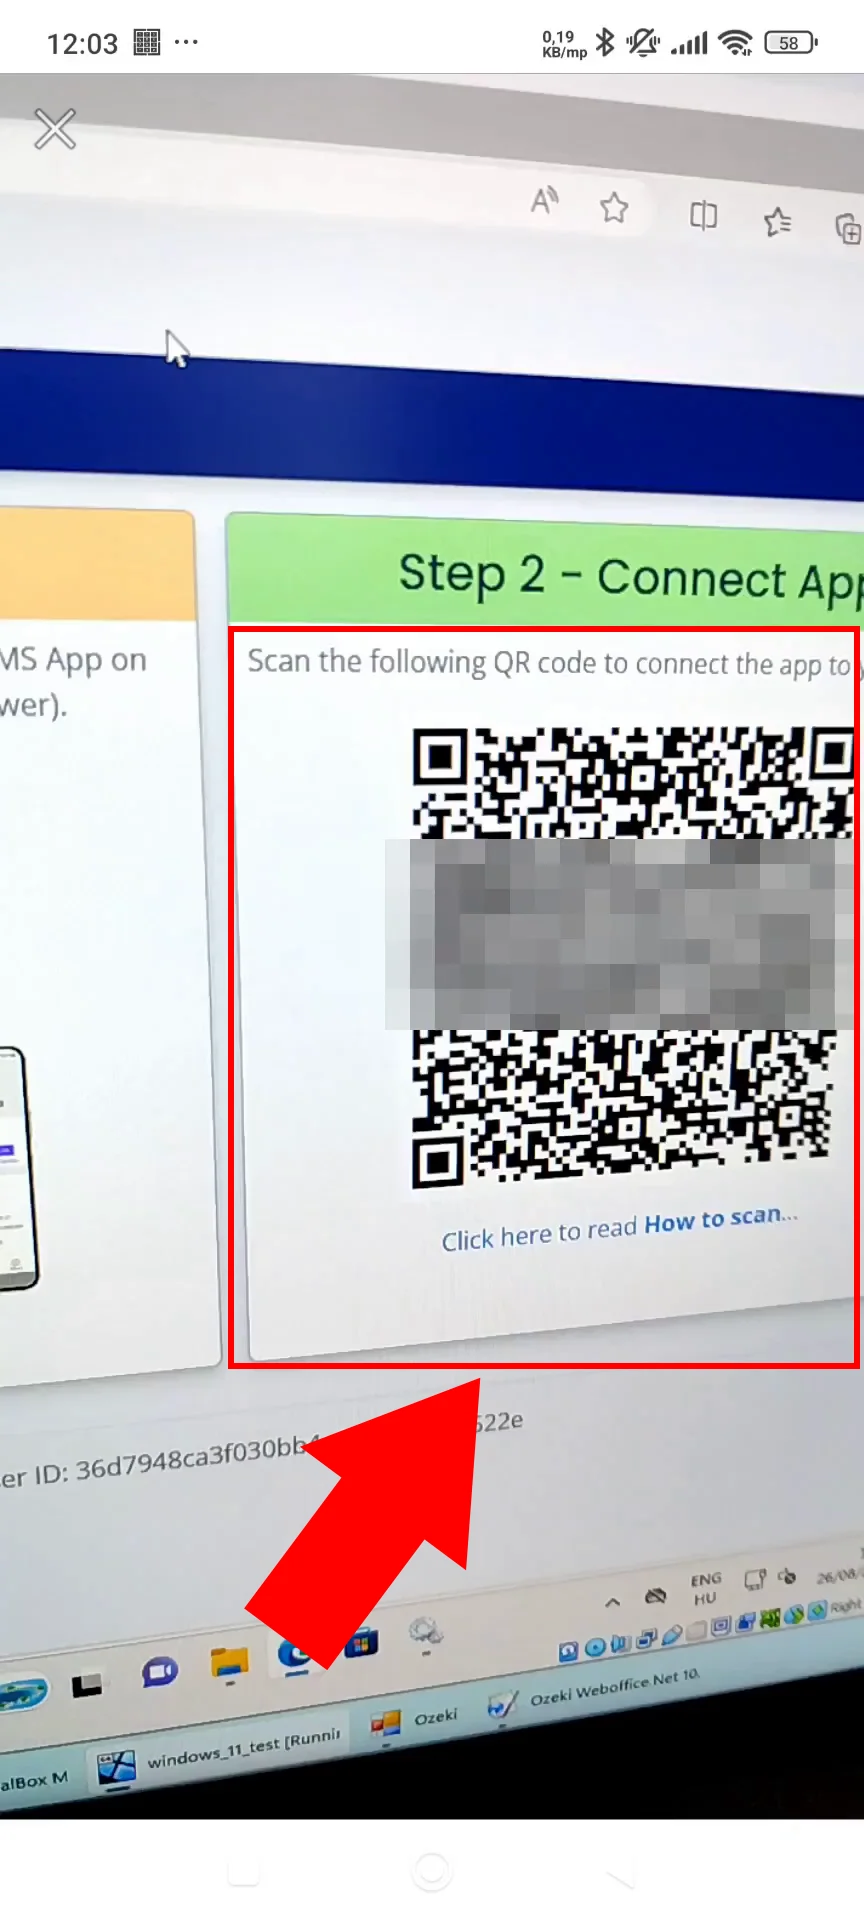
Just like in Figure 9, you have to scan the QR code to connect the application to your account.

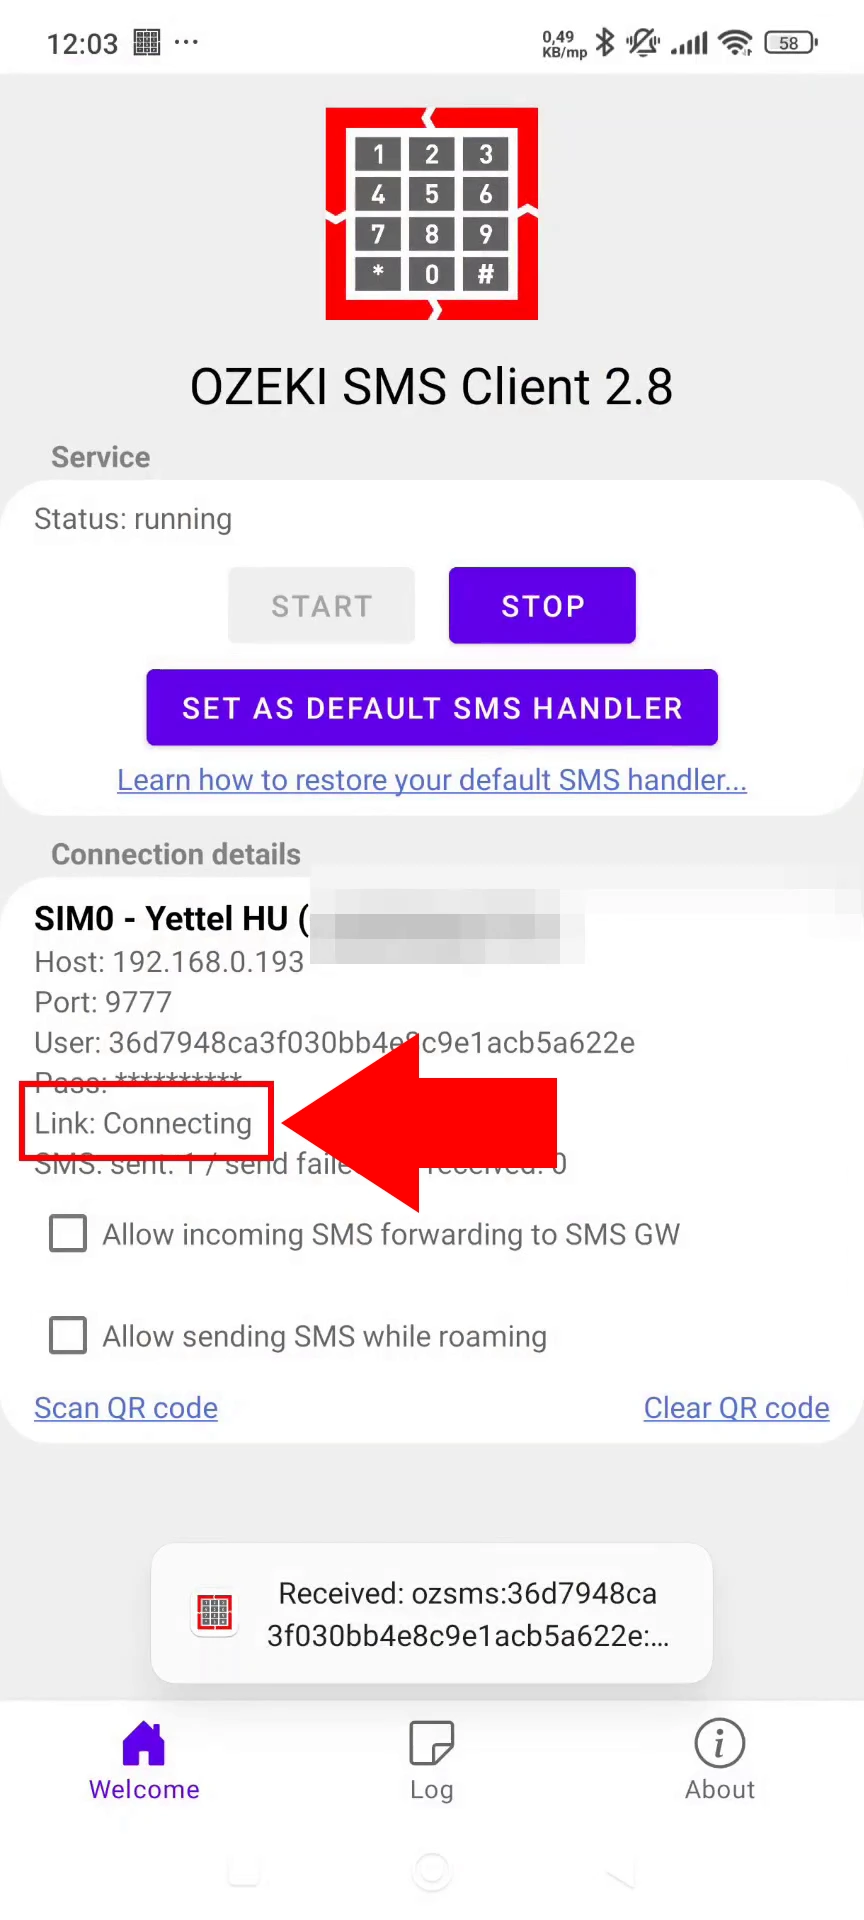
If you properly scan th QR code, it will automatically redirect you to the app. In the Ozeki Client application you should see that the link is connecting to myozeki the same way as shown in Figure 10.

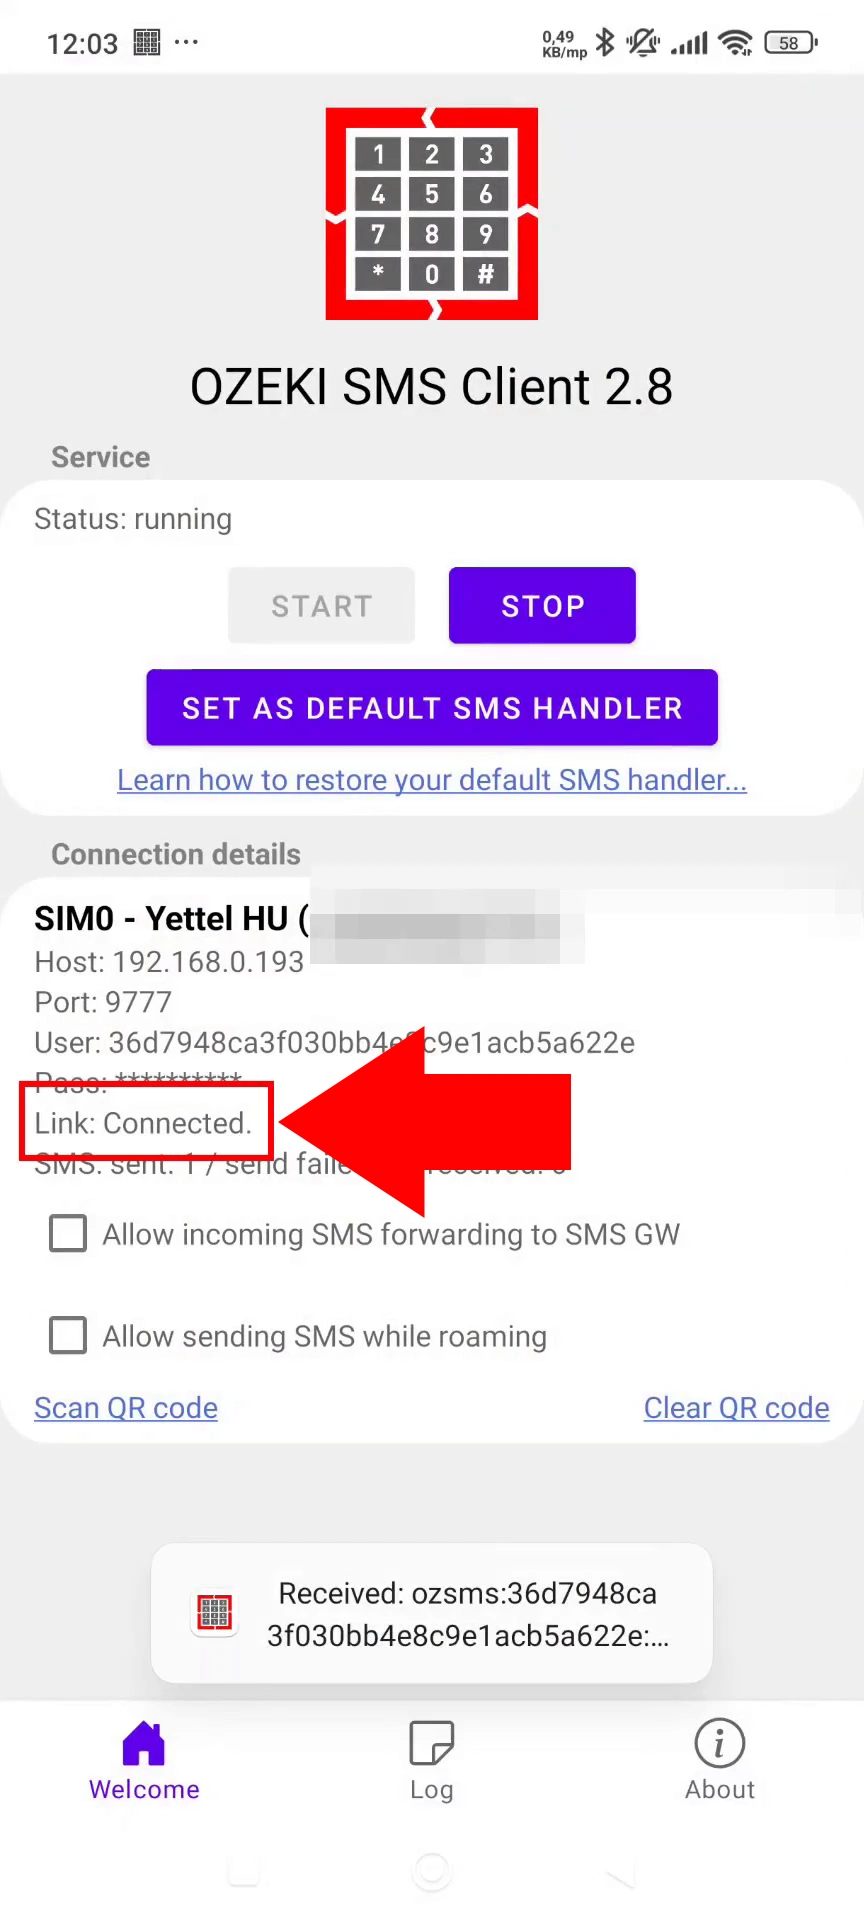
As Figure 11 showcases, the 'Connecting' sign will turn into 'Connected', indicating that the link is successfully connected to myozeki.

With this video we are showing you, that once you return to myozeki after successully connecting your phone to the service, the phone's details will appear.
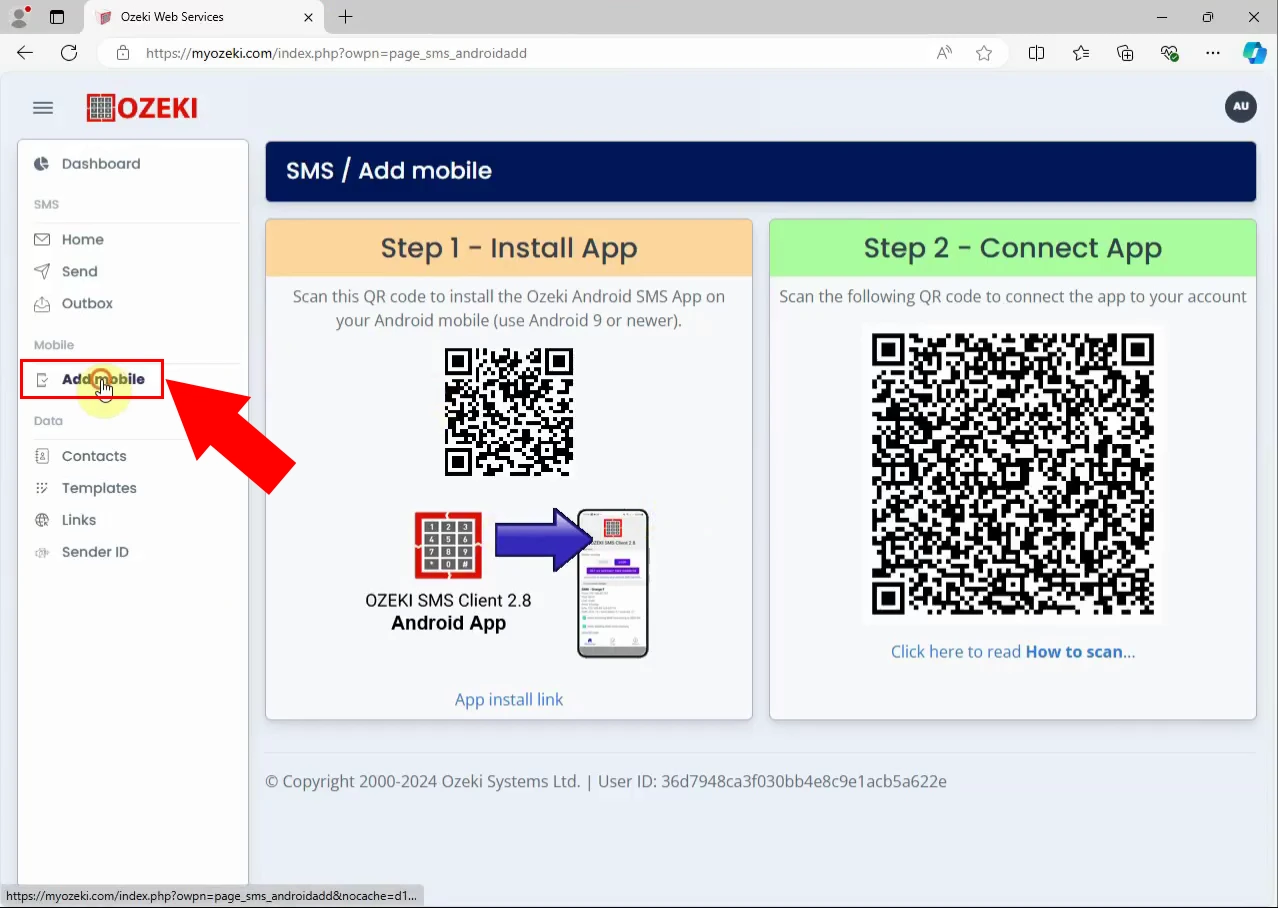
Return to your myozeki.com account. As shown in Figure 12, you need to open the mobile page once again by clicking on it.
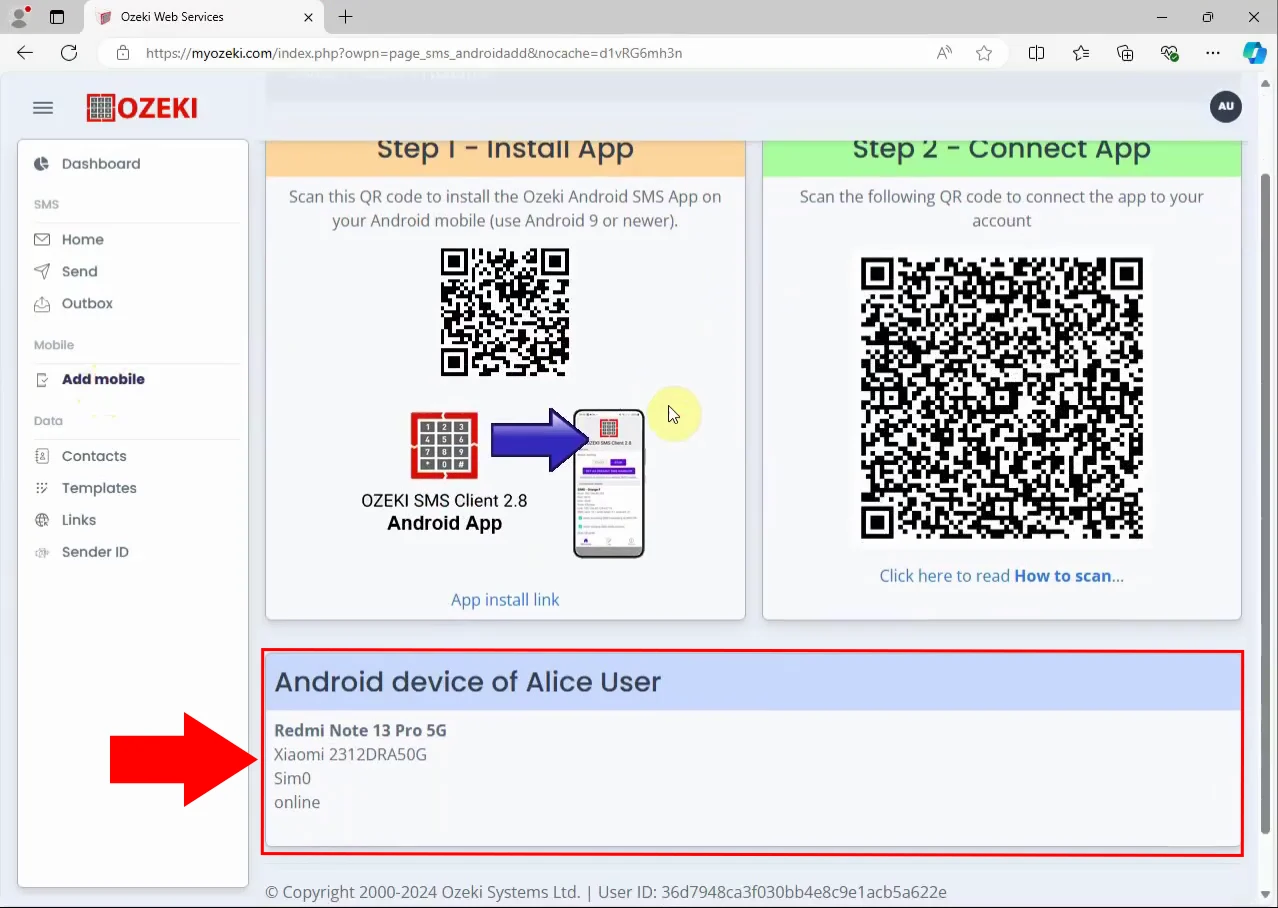
Just like in Figure 13, you will see that the recently connected phone is now added to the SMS service.
Step 4 - Send SMS messages
In the last video, we are goig to show you how to send SMS messages using the previously set up settings. The video start with selecting who you want to send a message then detailing the message and ends with sending it.
Sending SMS messages (Step-by-step guide)
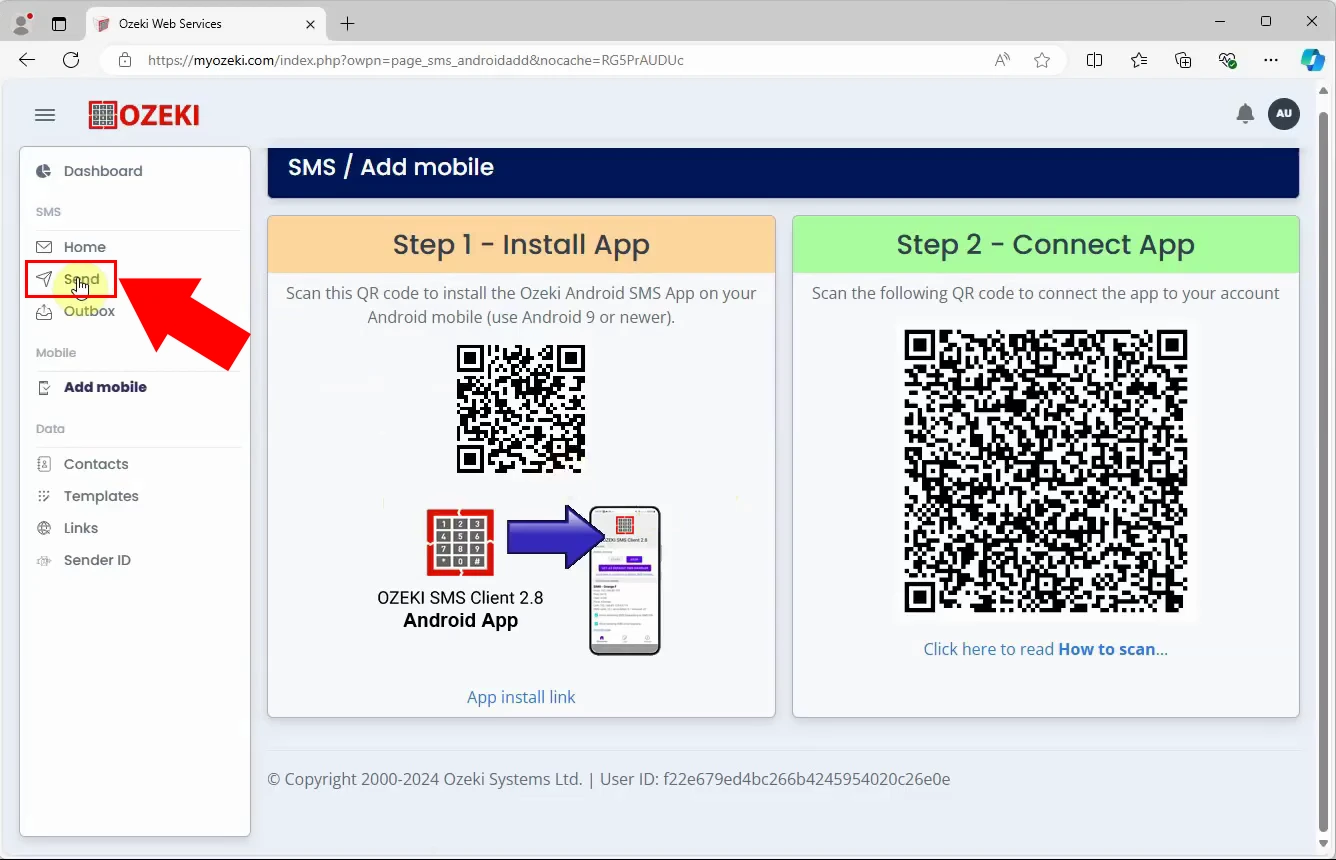
As shown in Figure 14, open the 'Send' menu from the left panel.
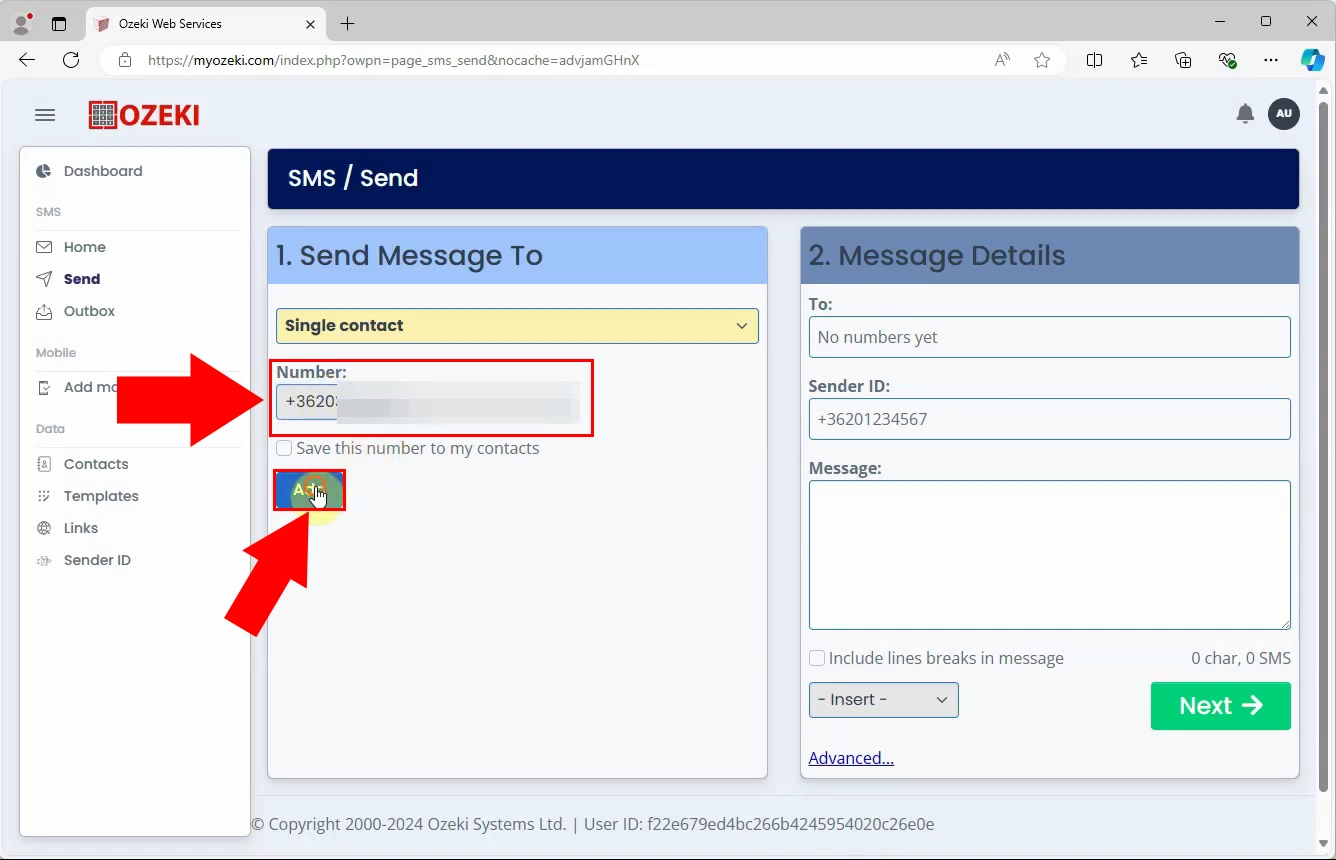
To add a phone number for sending an SMS, enter the number, including the country code in the 'Number' field under the Send Message To section. Click on the 'Add' button below to save it.
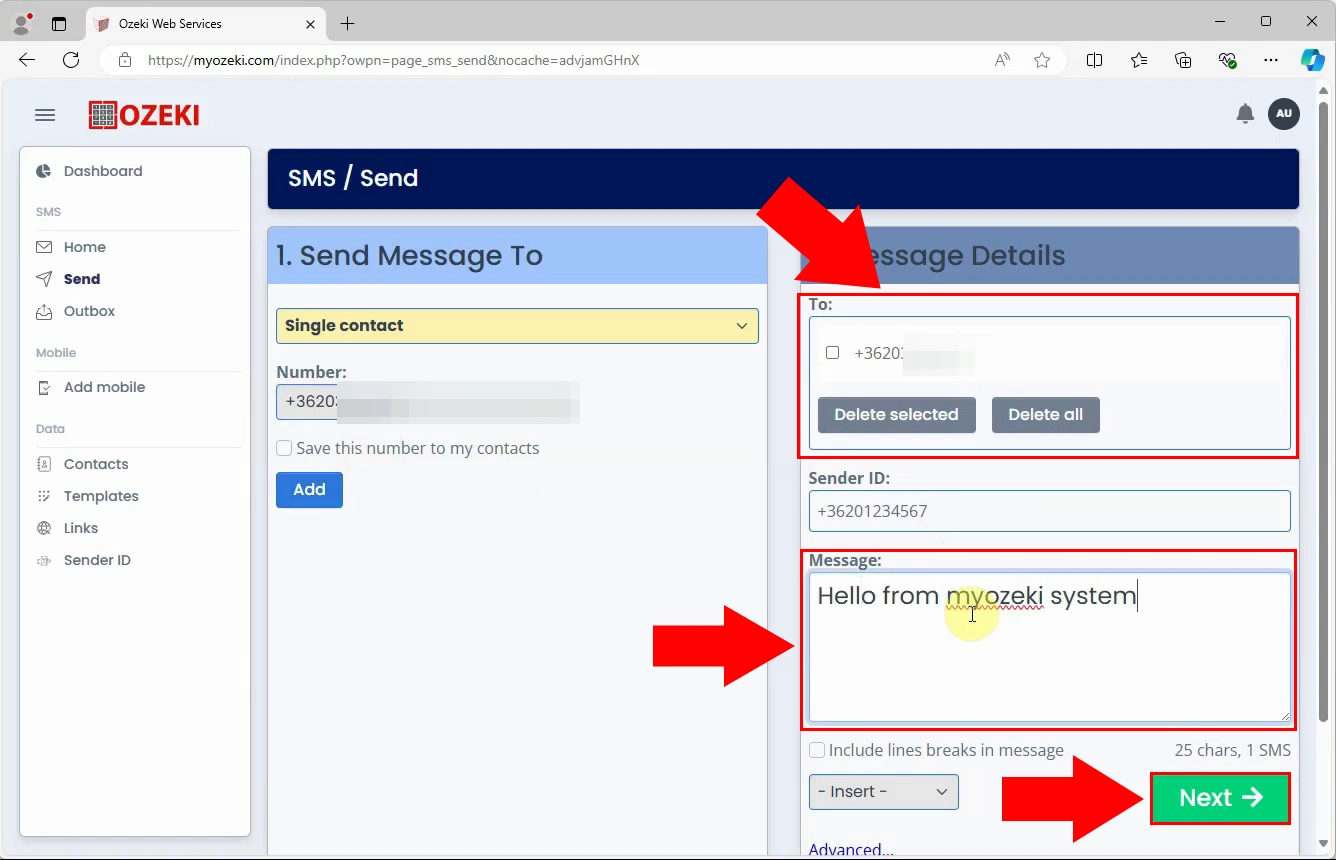
The number will appear in the To field in the right section, allowing you to proceed with composing your message. Write your message into the right textbox, and as the right arrow showcases, click on the 'Next' button.
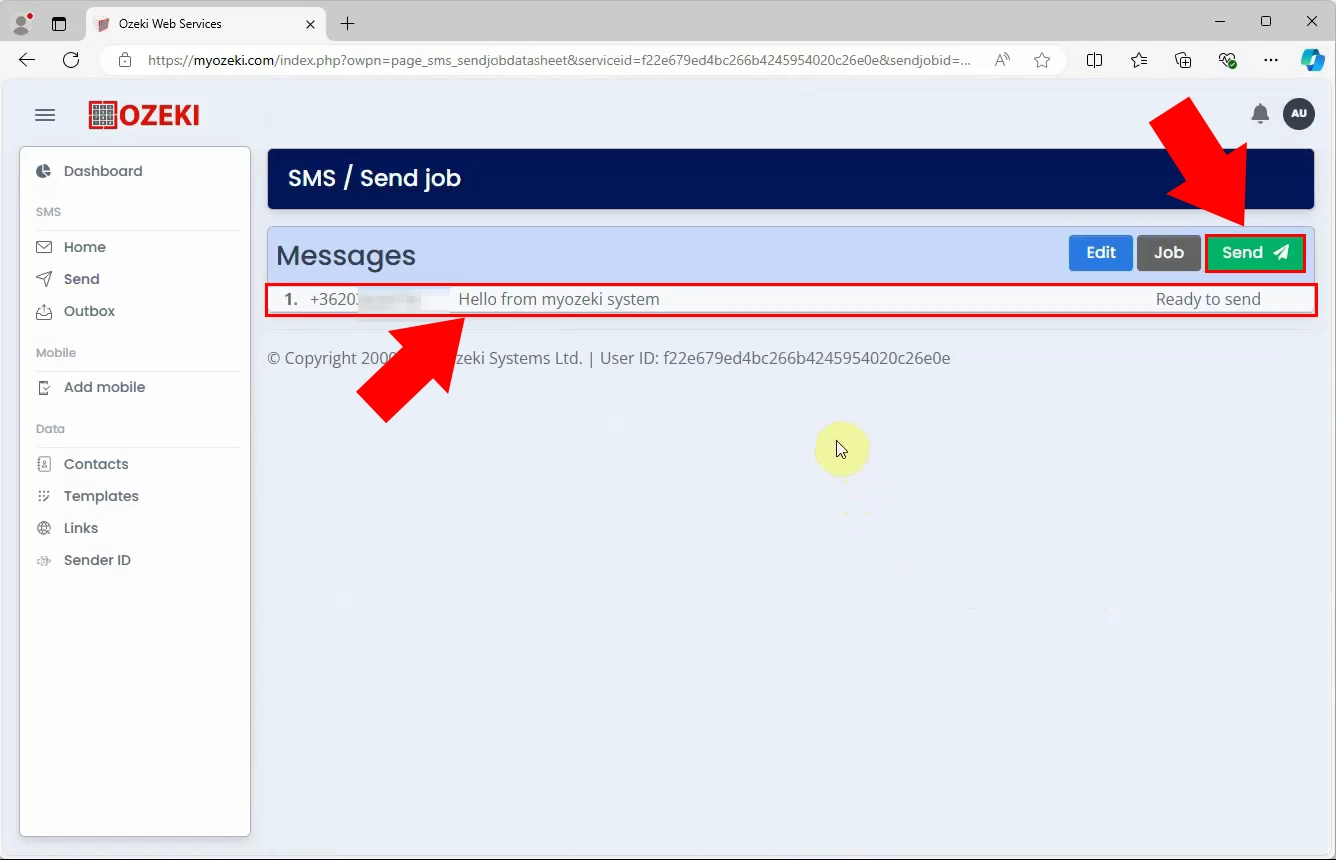
To send your message, review the details in the 'Messages' section. You can see the recipient's number along with the message content. Once you have confirmed everything is correct, click the 'Send' button on the right.
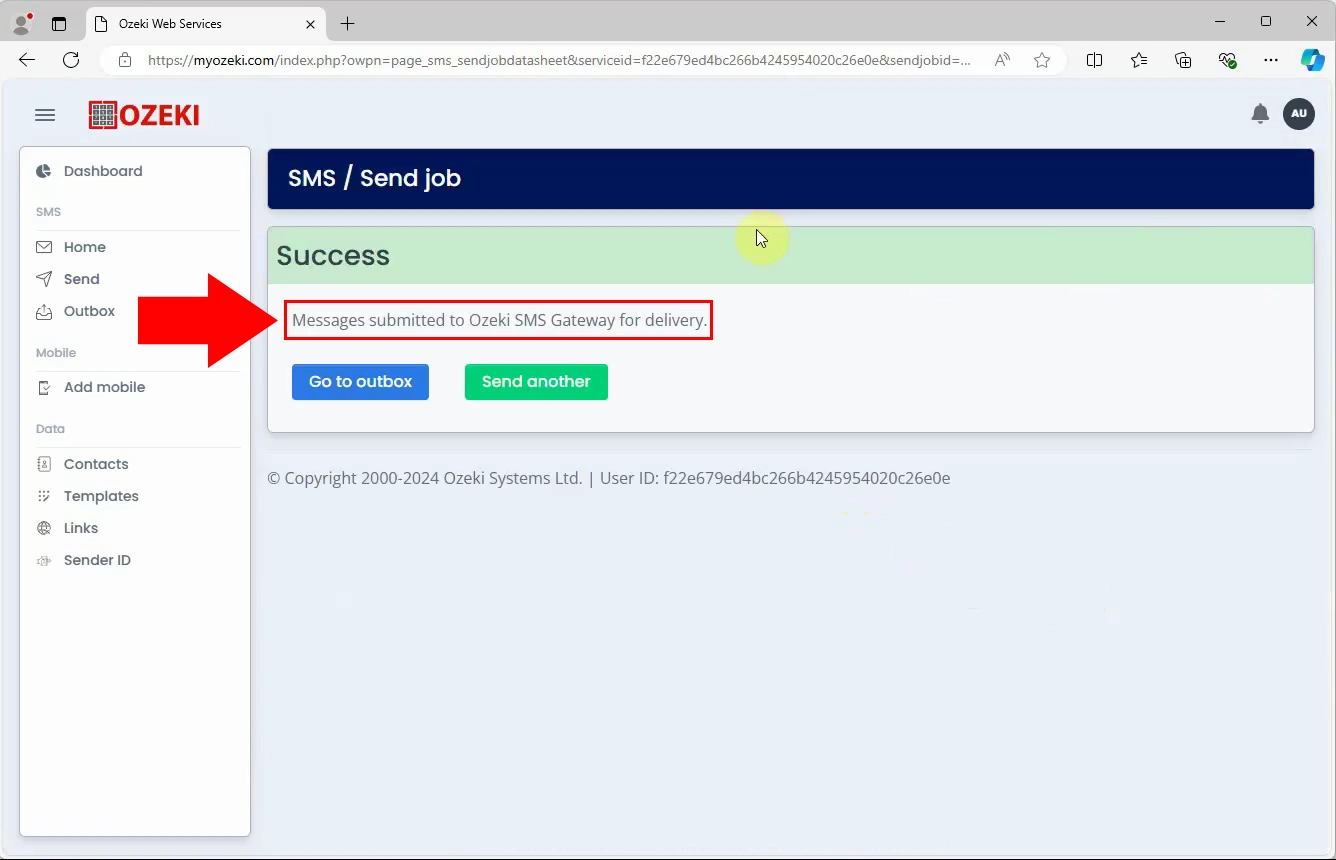
After sending the message, a confirmation screen will appear similar to the one in Figure 18, showing that your message was successfully submitted to Ozeki SMS Gateway for delivery.
Summary
Understanding how to use the Ozeki Web SMS service is important for businesses that want to improve their SMS marketing and notifications. This guide explains how to send SMS messages through myozeki.com using your Android phone to connect to the mobile network. Using an Android phone for SMS delivery is a fast and easy way to reach your audience and keep them informed. By improving your SMS communication, you can engage better with customers and provide timely updates.
