Ozeki Softphone in a Webbrowser
Follow this step-by-step tutorial to see how to download, install and use your OZEKI Softphone through helpful screenshots. These pictures demonstrate the finest steps including the registration of your VoIP PBX account and making a call.
Step 1: Download free trial
The first step for a working softphone system is to download and install the Ozeki Softphone. A free trial of OZEKI Softphone can be downloaded by clicking on the following link:
|
| OZEKI 10 contains the OZEKI Softphone Application Download OZEKI 10 Trial! |
Step 2: Install
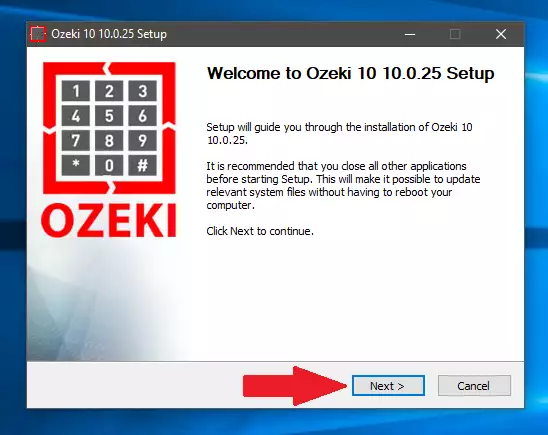
If you open the downloaded file, you will see the “Ozeki 10 Setup” window popping-up on you screen. You are now on the welcome page of the installer. Here you need to click the “Next >” button, as you can see on Figure 1.
On Figure 2, you can revise the license agreement of the software. You need to accept it to install our software on your computer. Click the “I Agree” button to accept the agreement.

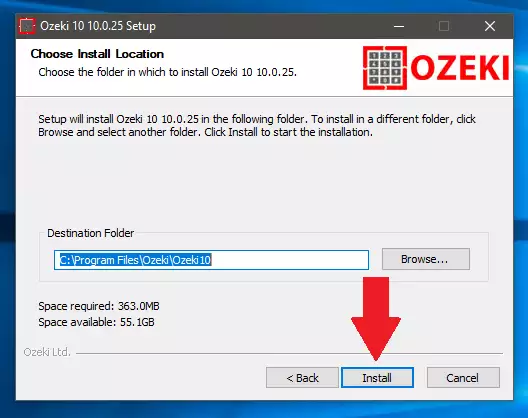
After you accepted the license agreement, you have to choose the location of the Ozeki 10’s files. As you can see on Figure 3, the default location is on your “C” drive. After you decided the location of the program, please click the “Install” button, and the installation should start.
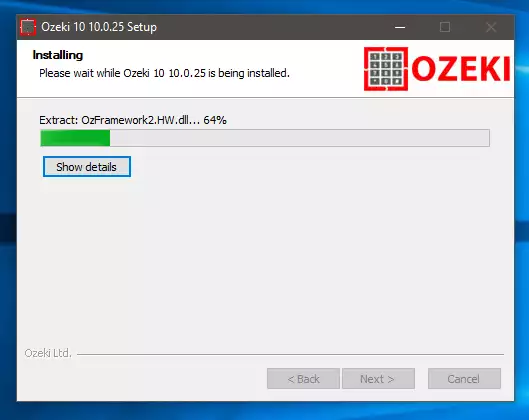
On Figure 4, you can see how you can inspect the installation process. You will have to wait until it finishes the procedure. After it, you will have a working software.
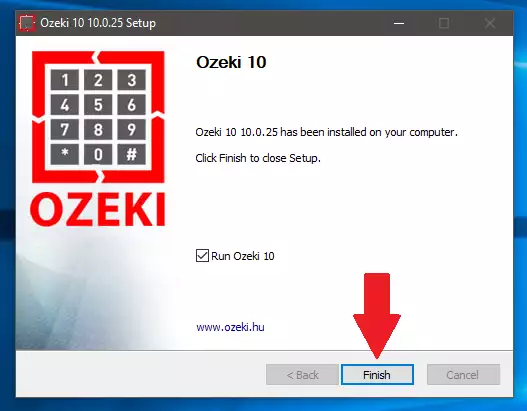
If you see a window like you can see on Figure 5, you have successfully installed Ozeki 10 on your computer. All you have to do is, click “Finish”. If you have the “Run Ozeki 10” option chosen, the Ozeki 10 will start as soon as you click “Finish”.
Step 3: Login
To have access to all the features of the Ozeki 10, you have to login with your username and password. To do this, launch the Ozeki 10 application and type your username in the top field, and your password in the bottom field. We used example login credentials on Figure 6.

Step 4: Open Softphone

Step 5: Register
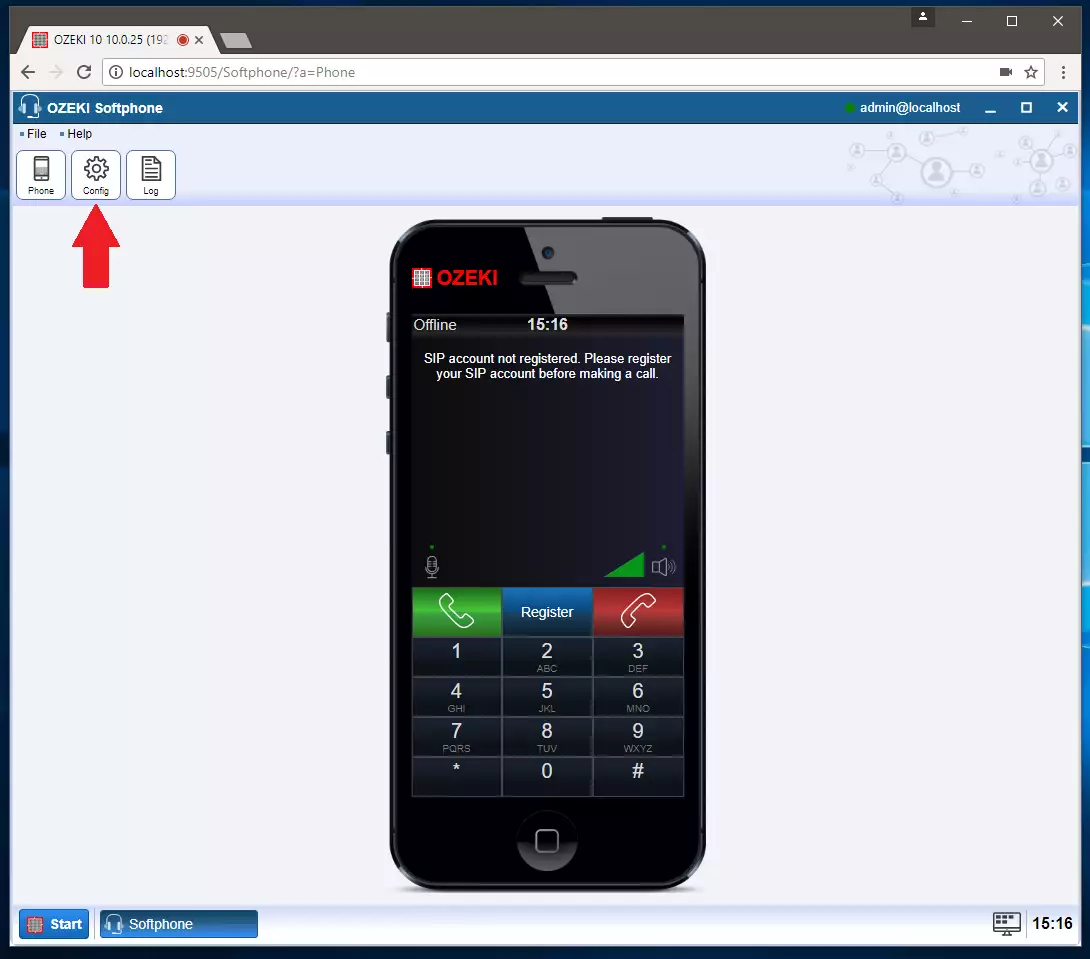
To use the softphone, please register a new device. To do this, you will have to go to the “Settings” panel. Click on the “Config” button to do that. You can find the button on Figure 8.
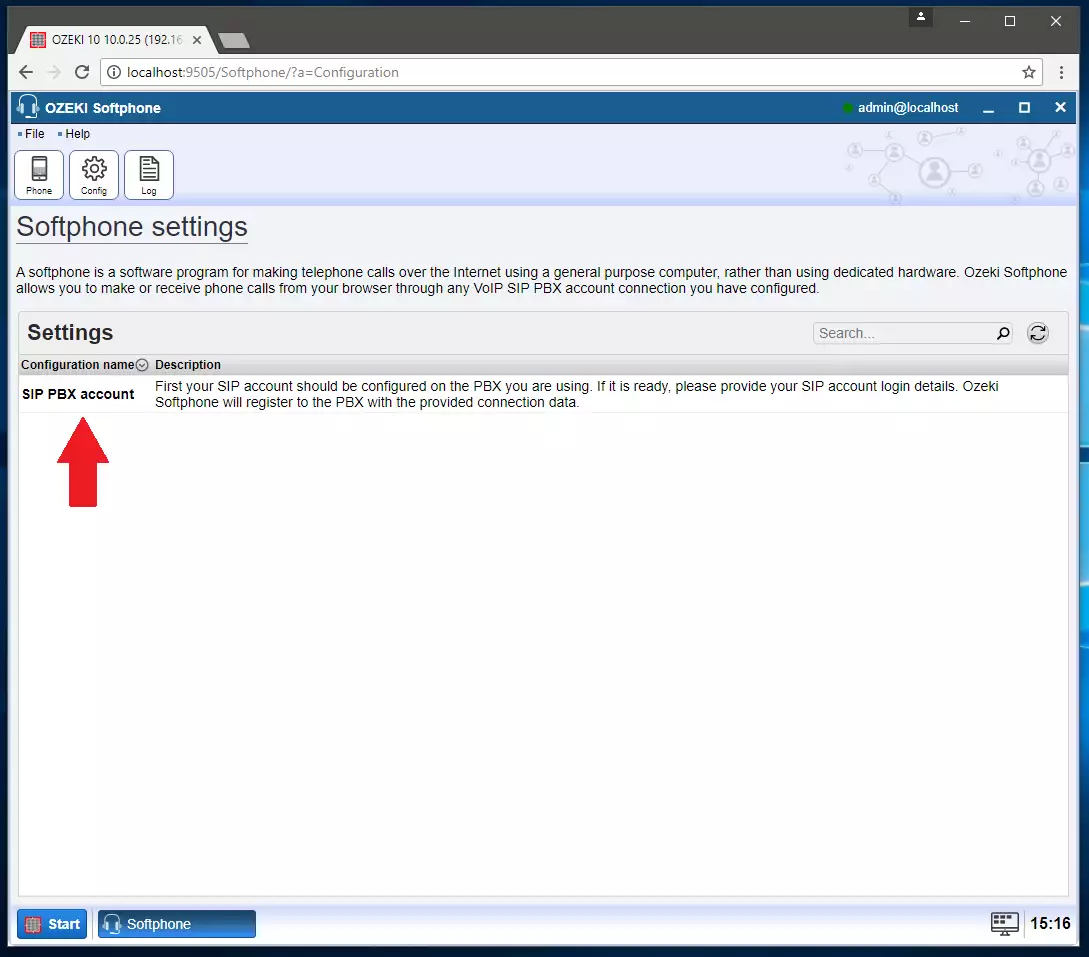
On the “Settings” window, click the “SIP PBX account” to start setting up the new device. On Figure 9 you can find the SIP PBX account.
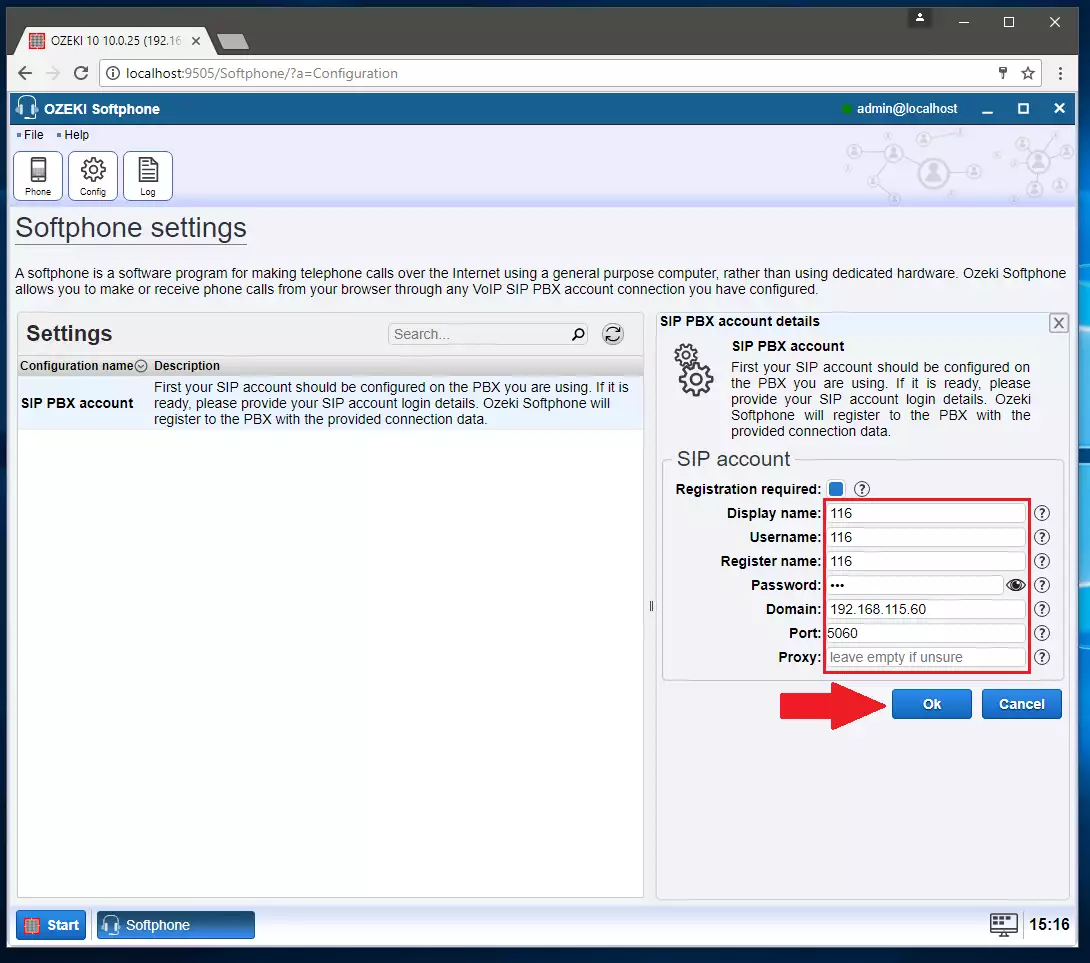
On Figure 10, you can see how the SIP PBX account should be configured. You will have to type in your own credentials in all the fields you can see. We used example credentials.
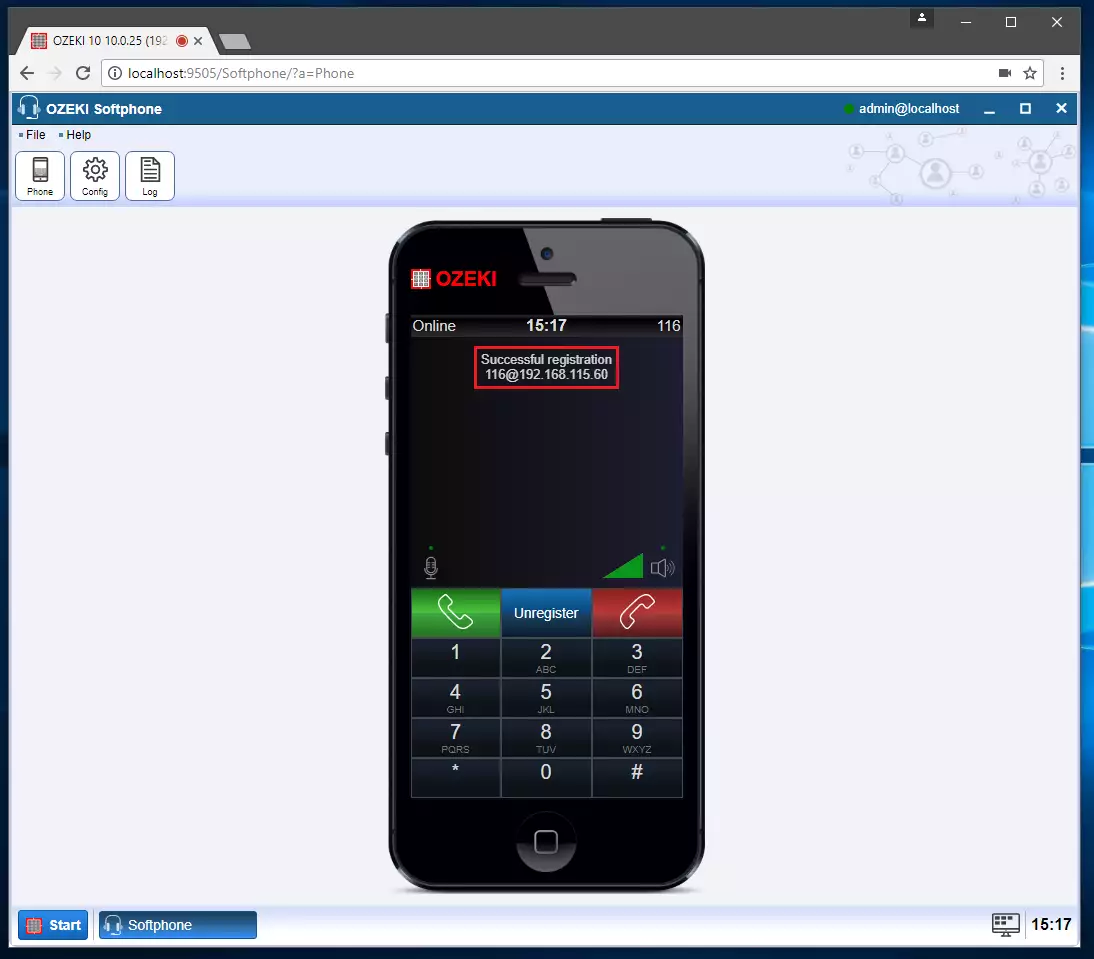
Now that you have the SIP PBX account set up, you need to click “Register” on the softphone. The device will automatically register itself, as you can see on Figure 11.

The device should automatically register itself and write out some of the credentials as it is presented on Figure 12.
Step 6: Test Call
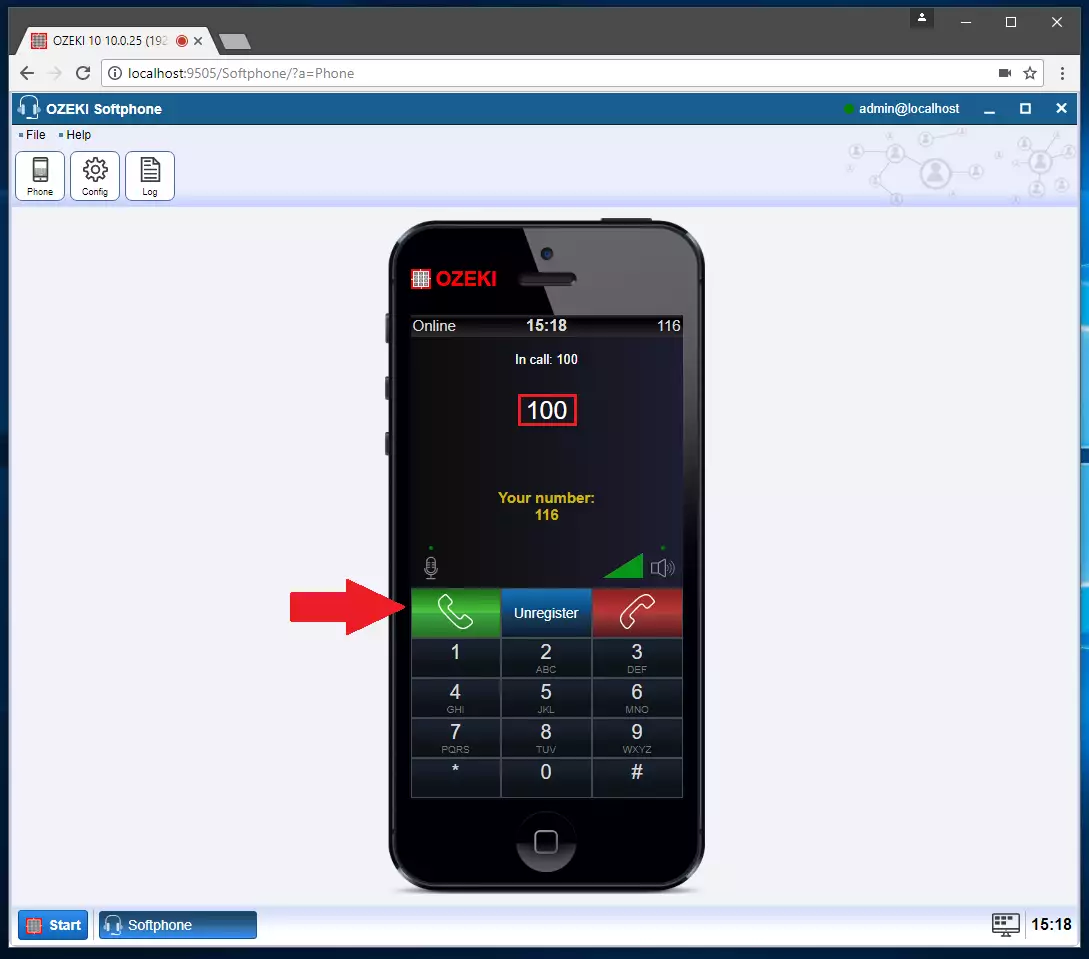
Now you are done with the setup of the Ozeki 10 and the new device registration. To make your first call, type in the number you wish to call and hit the green phone button on the left side of the device. Your number will be presented on the screen as you can see on Figure 13.
We hope that this guide was helpful. If you have any problem with any of the steps, feel free to contact us at info@ozeki.hu
