UCP to SMPP protocol converter
On this page you will find a detailed step by step guide that shows you how to configure the Ozeki SMS Gateway to forward an SMS from a UCP connection over an SMPP connection.
Step 1 - Add new connection
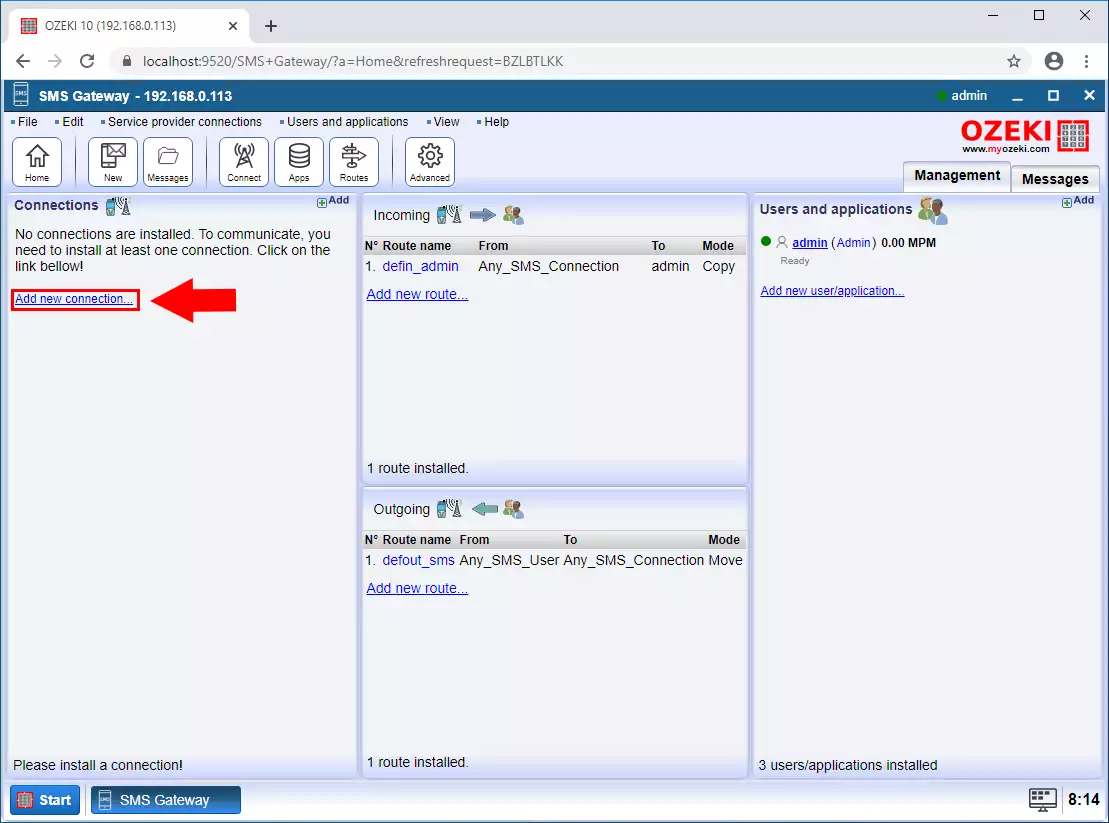
The first step is to connect to the SMPP service provider. To do this, you need to create an SMPP client connection. Click on the "Add new connection ..." as you can see on the Figure 1.
Step 2 - SMPP Client connection
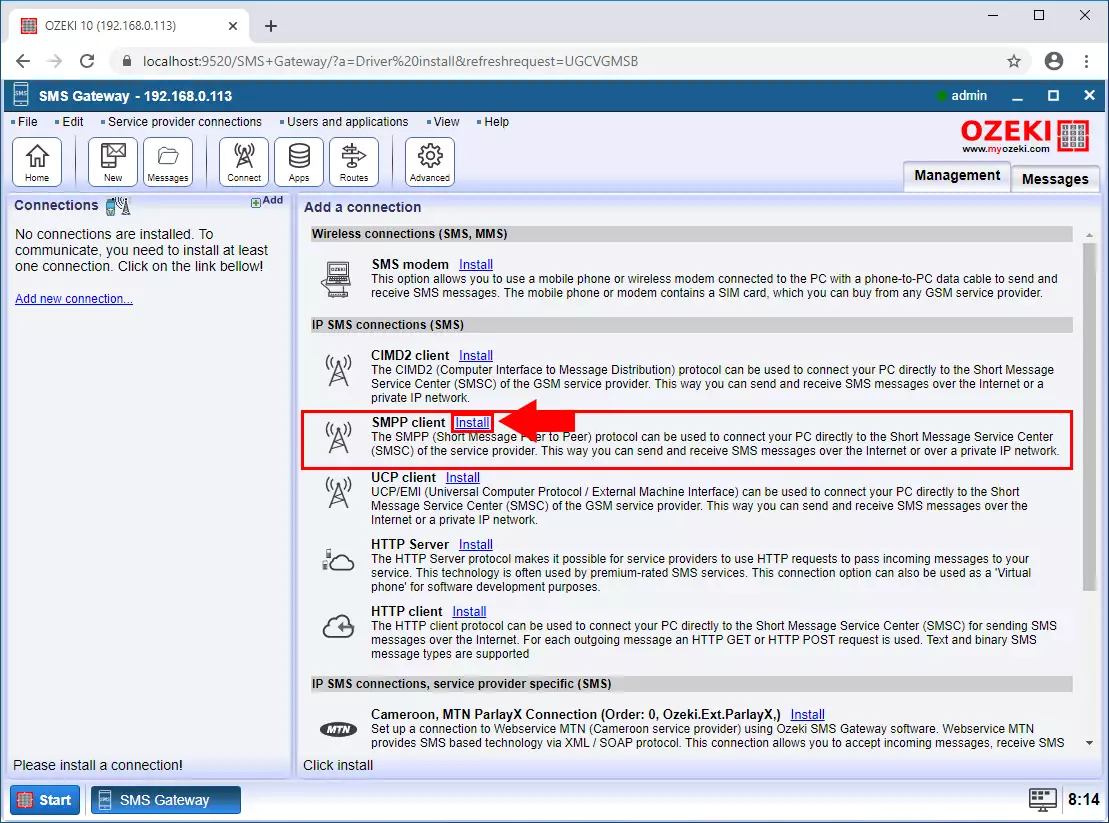
Select the SMPP Client connection from the list and click Install (Figure 2).
Step 3 - SMPP client user data
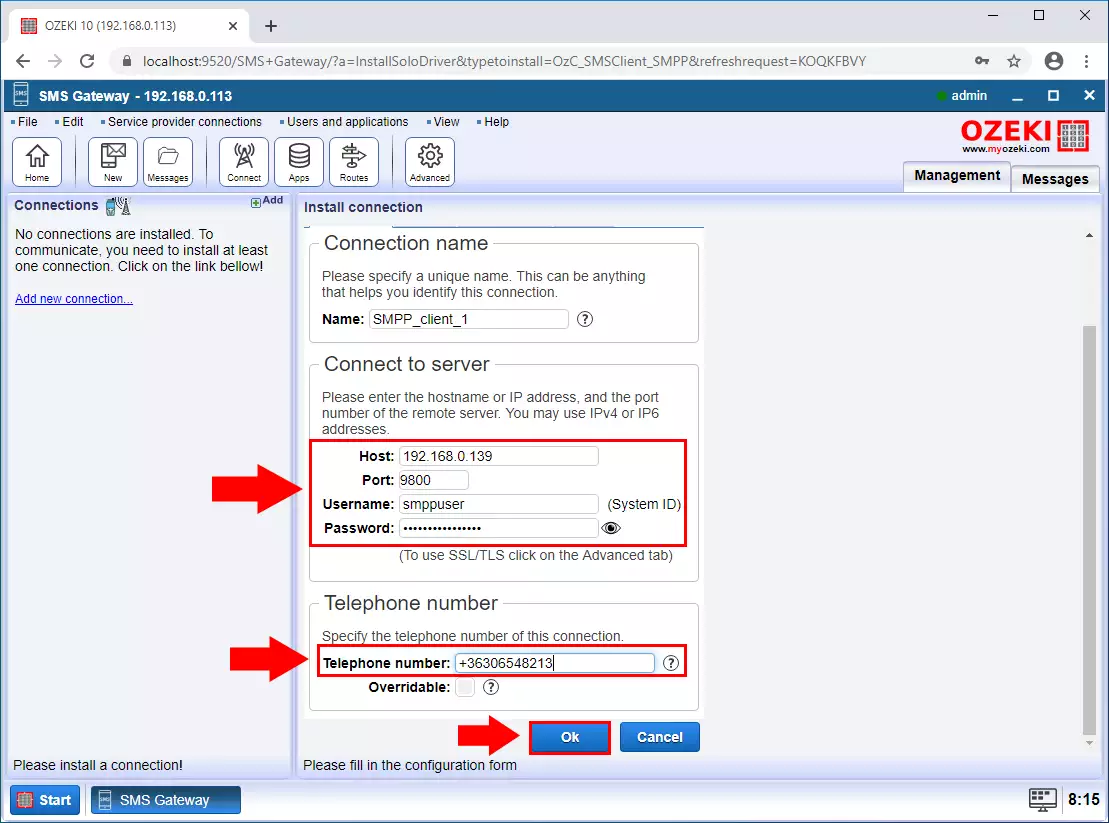
Now enter the contact details like Host, port, username and password. And enter the phone number that the SMS Gateway uses to send the message. Finally click on the OK button (Figure 3).
Step 4 - Client Connected
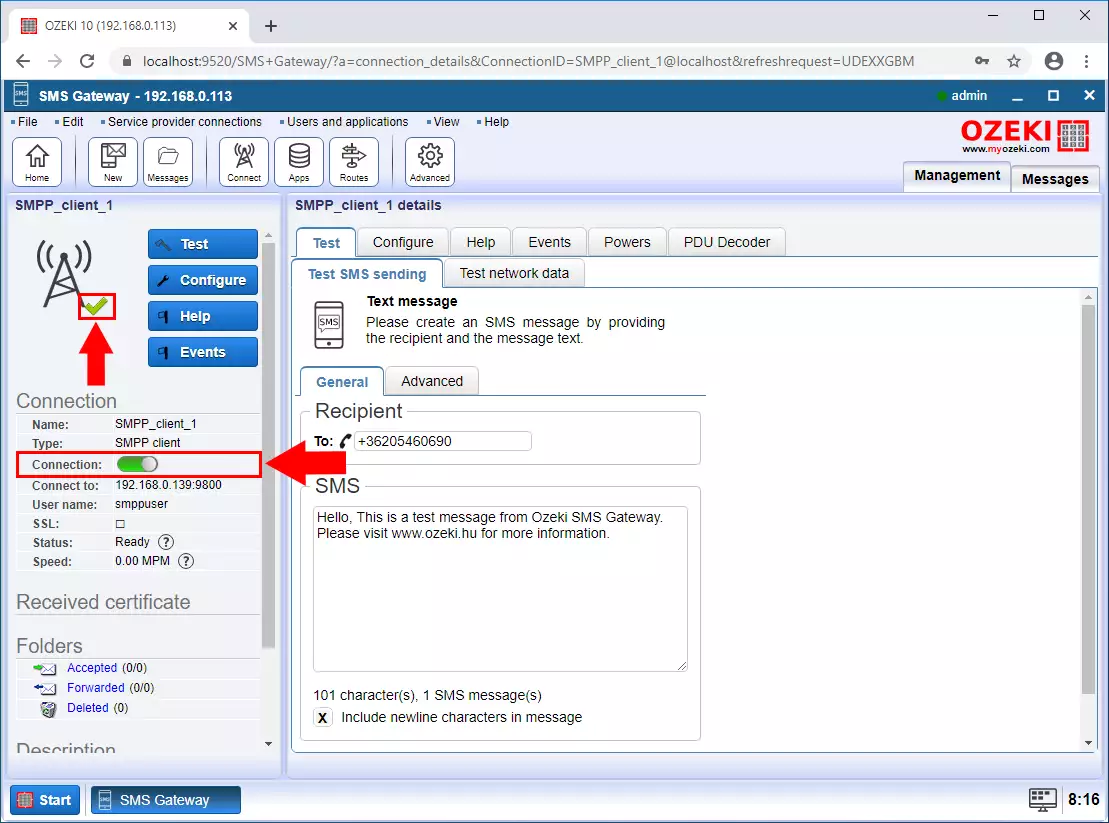
Next step is to enable the connection. If the connection is established with the service provider you can see the green pipe icon (Figure 4).
Step 5 - Add new user
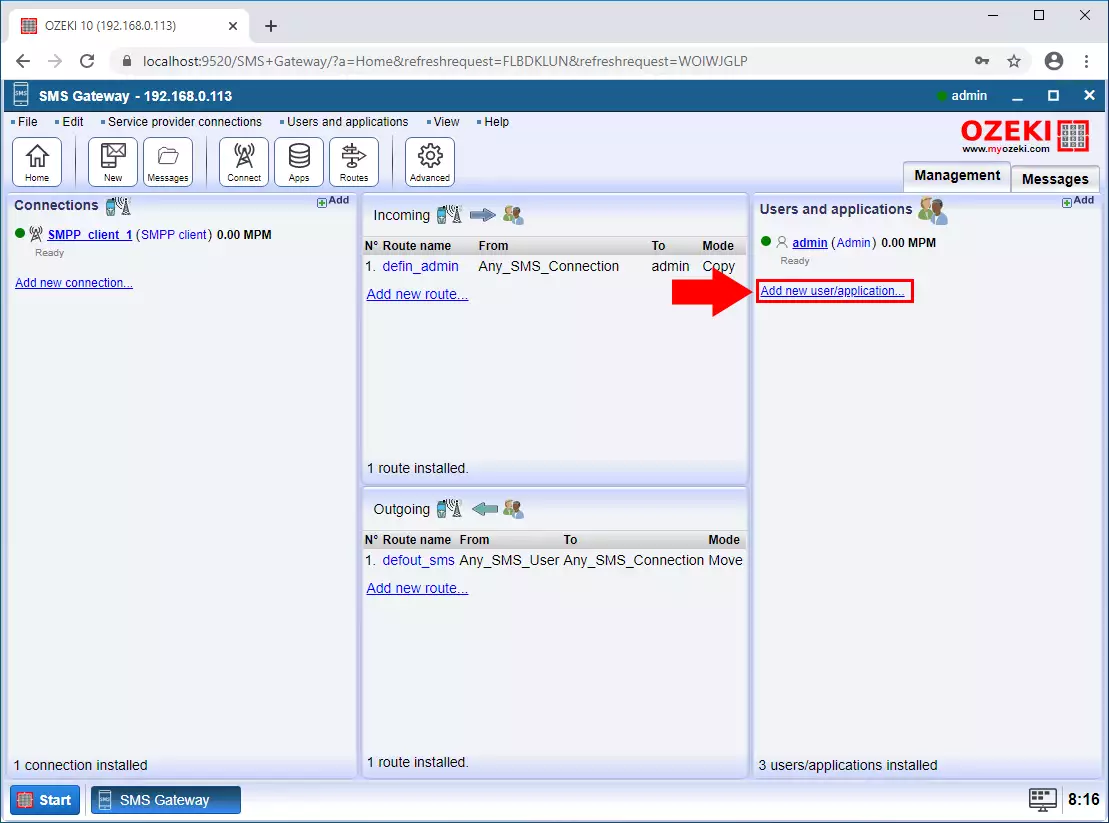
After it create a new user that the UCP client can connect to. Click "Add new user / application..." as you can see on the Figure 5.
Step 6 - UCP user
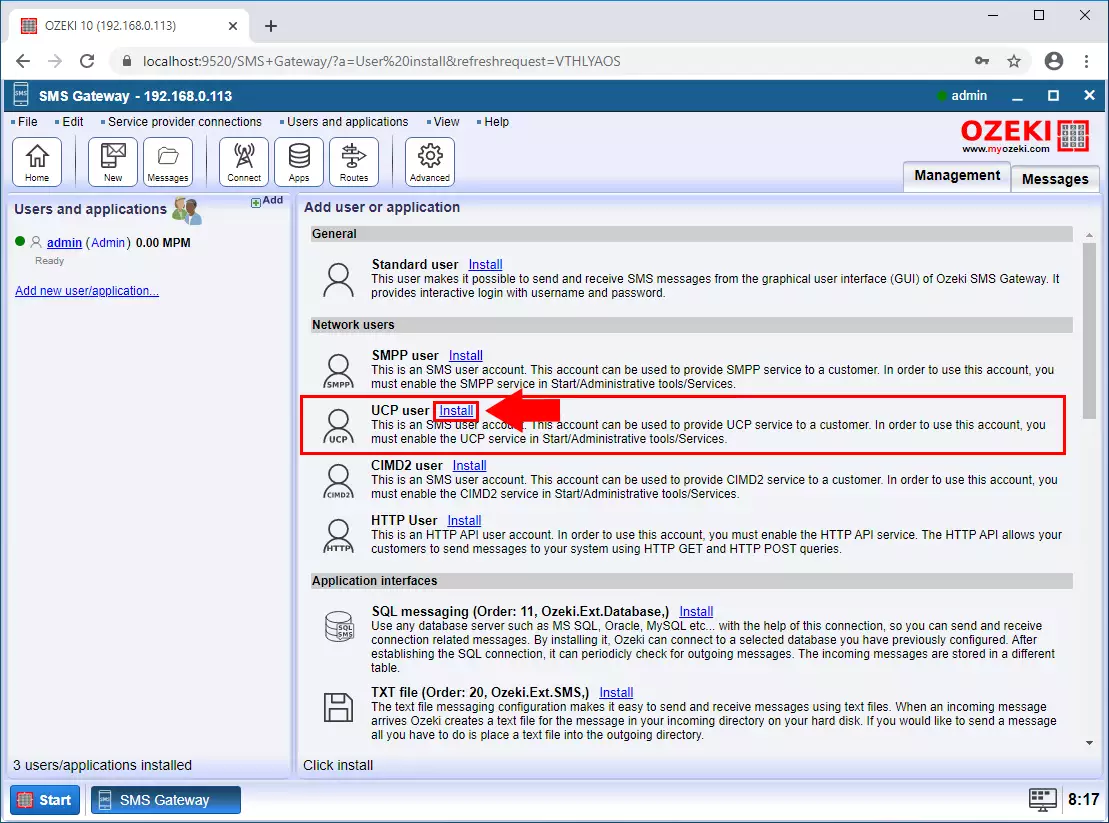
Select the UCP user service from the list and click Install (Figure 6).
Step 7 - Provide username and password
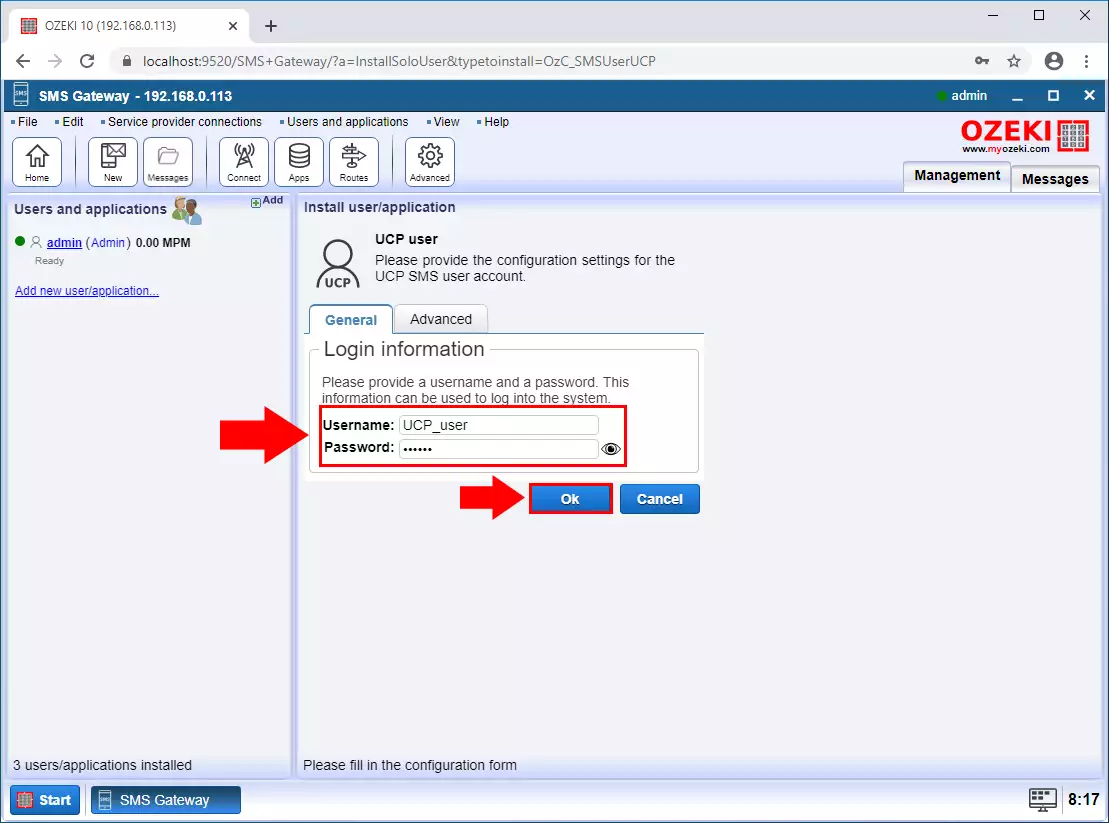
Provide the username and the password and then click on the OK button (Figure 7).
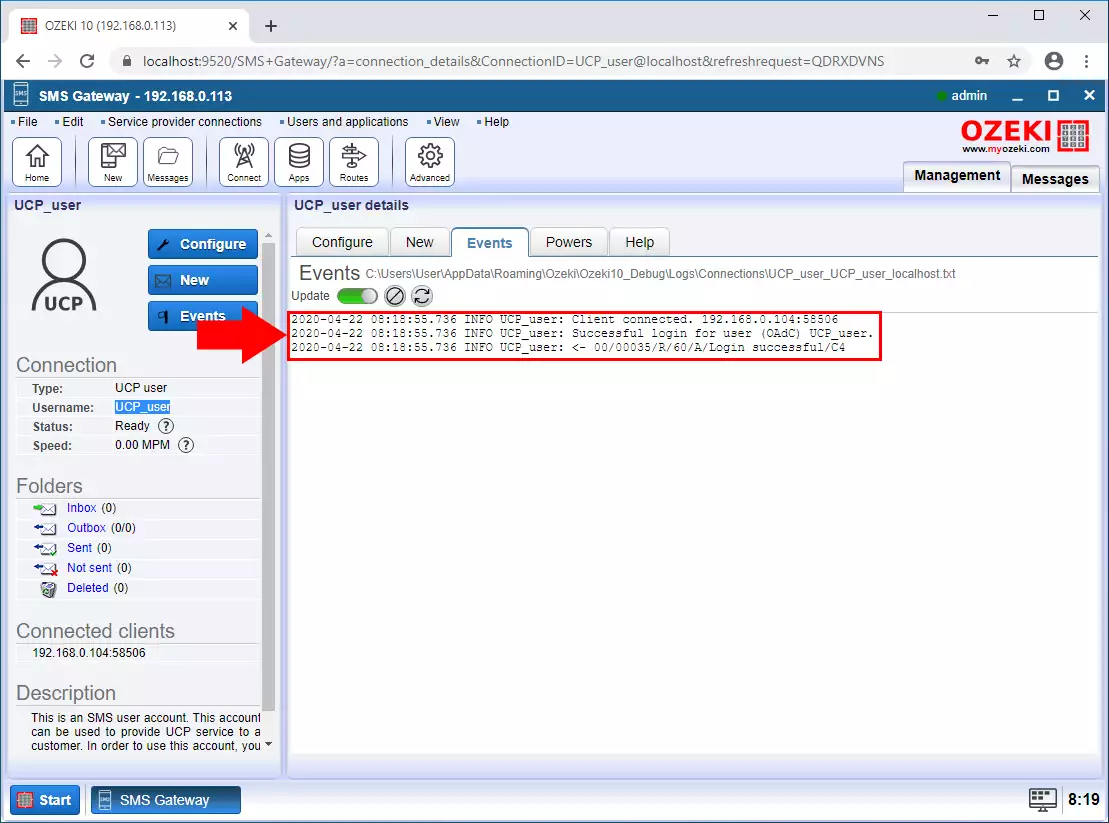
Step 8 - UCP client connected
On the user events tab, you can see if a client is connected to the service (Figure 8).
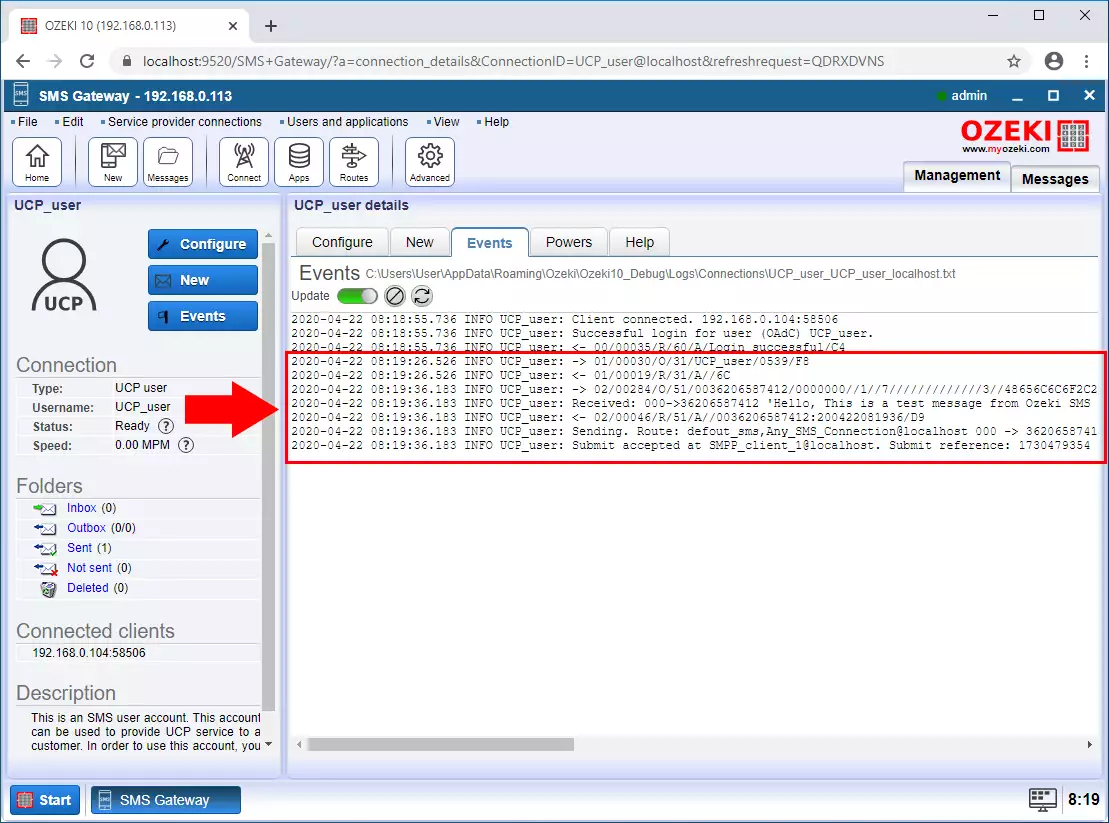
Step 9 - UCP message received
On the events tab, you can also see if an sms is coming from the client via the UCP connection (Figure 9).
Step 10 - SMPP message sent
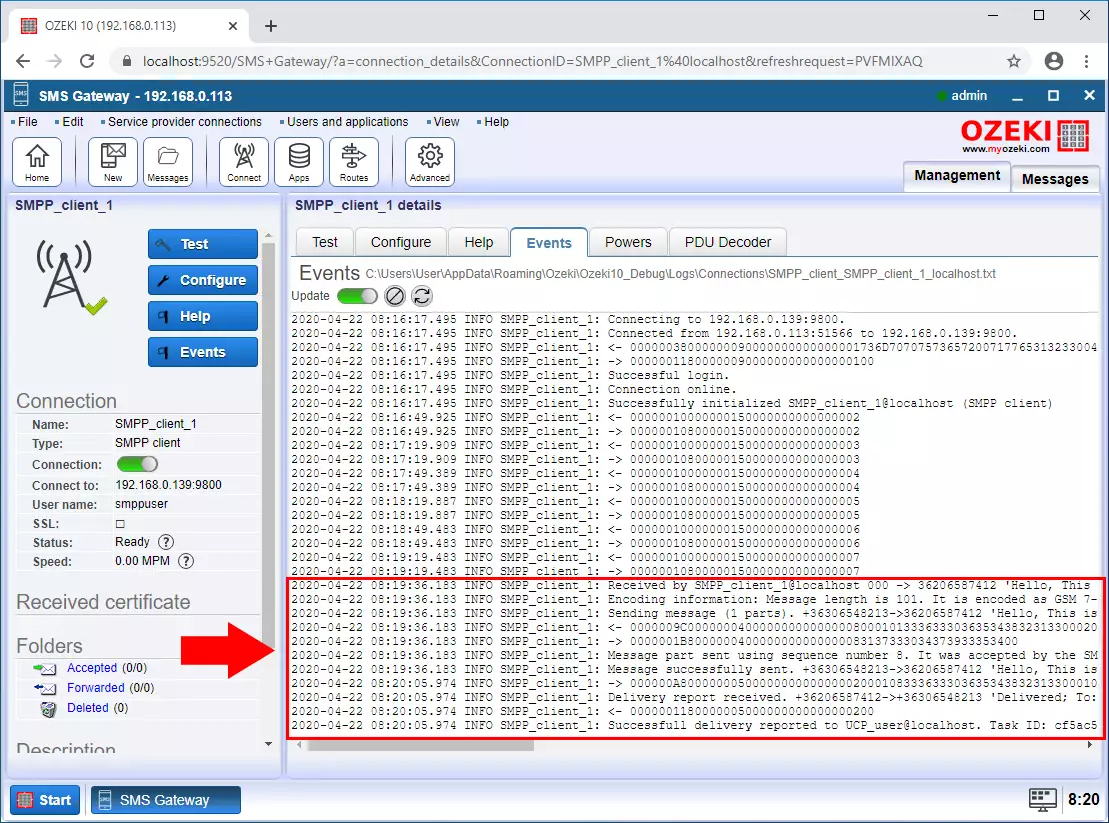
The Ozeki SMS Gateway forwards the message to the SMPP Client connection which sends the SMS to the Service Provider. This can be seen on the events tab of the SMPP Client connection (Figure 10).
