How to setup the Arduino IDE?
Contents
- Install the Software
- Windows Installations
- Mac Installation
- Linux Installation
- The Integrated Development Environment (IDE)
- Refereces
Install the Software
To get data from Arduino first you have to add commands to it. The Arduino software which is an IDE (Integrated Development Enviroment) sends / receives data from the computer
to the Arduino hardware. To be able to use it you have to install an IDE to your computer. To download the installer click ont he download link depending on your operation system:
- Windows: Arduino-1.0.5-r2-windows.zip
- Mac: Arduino-1.0.5-macosx.zip
- Linux 32bit: Arduino-1.0.5-linux32.tgz.zip
- Linux 64bit: Arduino-1.0.5-linux64.tgz.zip

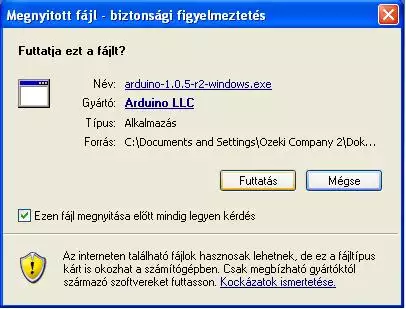
After downloading installation file to your computer install the software in the following ways:

Windows Installations
- Connect your Arduino board via USB and wait for Windows to begin its driver installation process. After a few moments, the process will fail. (Don't worry, it is not unexpected.)
- Click on the Start Menu, and open up the Control Panel.
- While in the Control Panel, navigate to System and Security. Next, click on System. Once the System window is up, open the Device Manager
- Look under Ports (COM & LPT). You should see an open port named "Arduino UNO (COMxx)".
- Right click on the "Arduino UNO (COMxx)" port and choose the "Update Driver Software" option.
- Next, choose the "Browse my computer for Driver software" option.
- Finally, navigate to and select the Uno’s driver file, named "ArduinoUNO.inf",located in the "Drivers" folder of the Arduino Software download (not the"FTDI USB Drivers" sub-directory).
- Windows will finish up the driver installation from there.
- Double-click the Arduino application.
- Open the LED blink example sketch: File > Examples > 1.Basics > Blink
- Select Arduino Uno under the Tools > Board menu.
- Select your serial port (if you don’t know which one, disconnect the UNO and the entry that disappears is the right one.)
- Click the Upload button.
- After the message “Done uploading” appears, you should see the “L” LED blinking once a second. (The “L” LED is on the Arduino directly behind the USB port.)
Mac Installation
- Connect the board via USB.
- Drag the Arduino application onto your hard drive.
- When Network Preferences comes up, just click “Apply” (remember the/dev/tty/usb.)
- Start the program.
- Open the LED blink example sketch: File > Examples > 1.Basics > Blink
- Select Arduino Uno under the Tools > Board menu.
- Select your serial port (if you don’t know which one, disconnect the UNO and the entry that disappears is the right one.)
- Click the Upload button.
- After the message “Done uploading” appears, you should see the “L” LED blinking once a second. (The “L” LED is on the Arduino directly behind the USB connection)
Linux Installation
- Install gcc-avr and avr-libc
- sudo apt-get install gcc-avr avr-libc
If you don’t have openjdk-6-jre already, install and configure that too:
- sudo apt-get install openjdk-6-jre
- sudo update-alternatives --config java
- Select the correct JRE if you have more than one installed.
Go to http://arduino.cc/en/Main/Software/ and download the Arduino Software for Linux. You can untar and run it with the following command:
- tar xzvf arduino-x.x.x-linux64.tgz
- cd arduino-1.0.1
- ./arduino
The Integrated Development Environment (IDE)
You use the Arduino IDE on your computer to create, open, and change sketches (Arduino calls programs “sketches”. We will use the two words interchangeably in this book.). Sketches define what the board will do. You can either use the buttons along the top of the IDE or the menu items.

Parts of the IDE:
- Compile - Before your program“code”can be sent to the board ,it needs to be converted into instructions that the board understands. This process is called compiling.
- Stop - This stops the compilation process.(I have never used this button and you probably won’t have a need to either.)
- Create new Sketch – This opens a new window to create a new sketch.
- Open Existing Sketch - This loads a sketch from a file on your computer.
- Save Sketch – This saves the changes to the sketch you are working on.
- Sketch Editor – This is where you write or edit sketches
- Text Console - This shows you what the IDE is currently doing and is also where error messages display if you make a mistake in typing your program. (often called a syntax error)
- Line Number - This shows you what line number your cursor is on. It is useful since the compiler gives error messages with a line number
