How to share documents in the Ozeki Virtual Classroom
In the Ozeki Virtual Classroom, the teacher can share Audio, Picture, Text, Video or any other Document to the students. These files can be downloaded later by everybody.
Step 1 - Create new Document
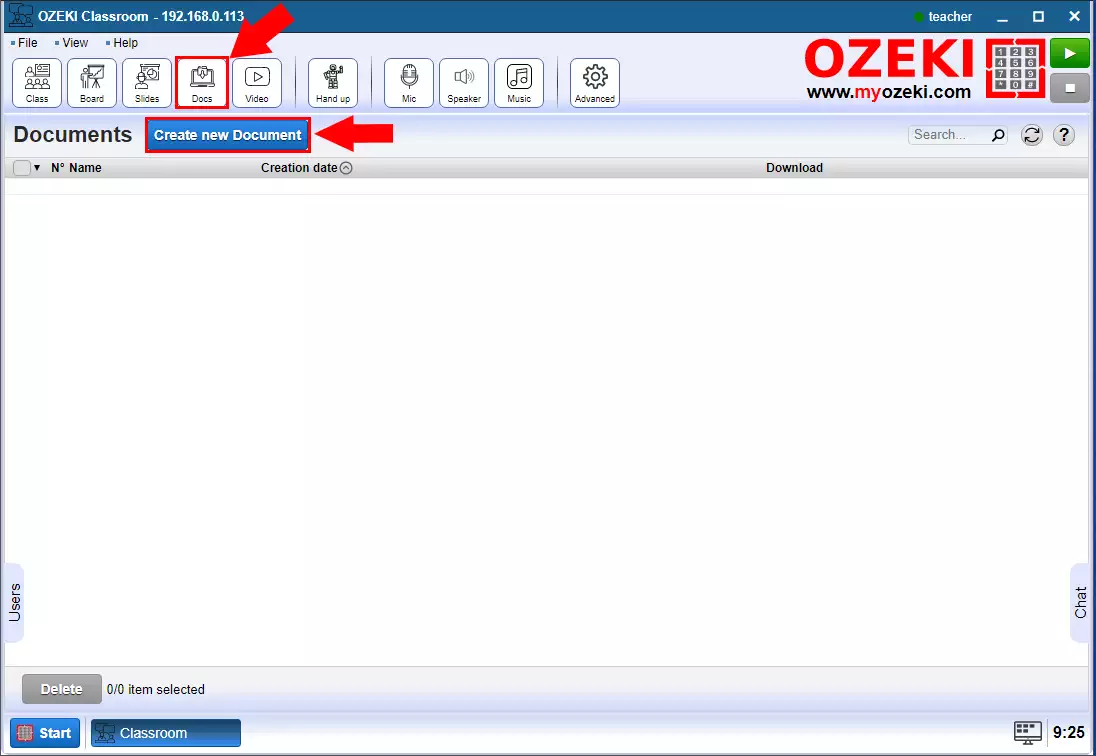
First step is to open the Docs menu on the top of the Ozeki Virtual Classroom page. In the Docs menu click on the Creat new Document button (Figure 1).

Step 2 - Document types
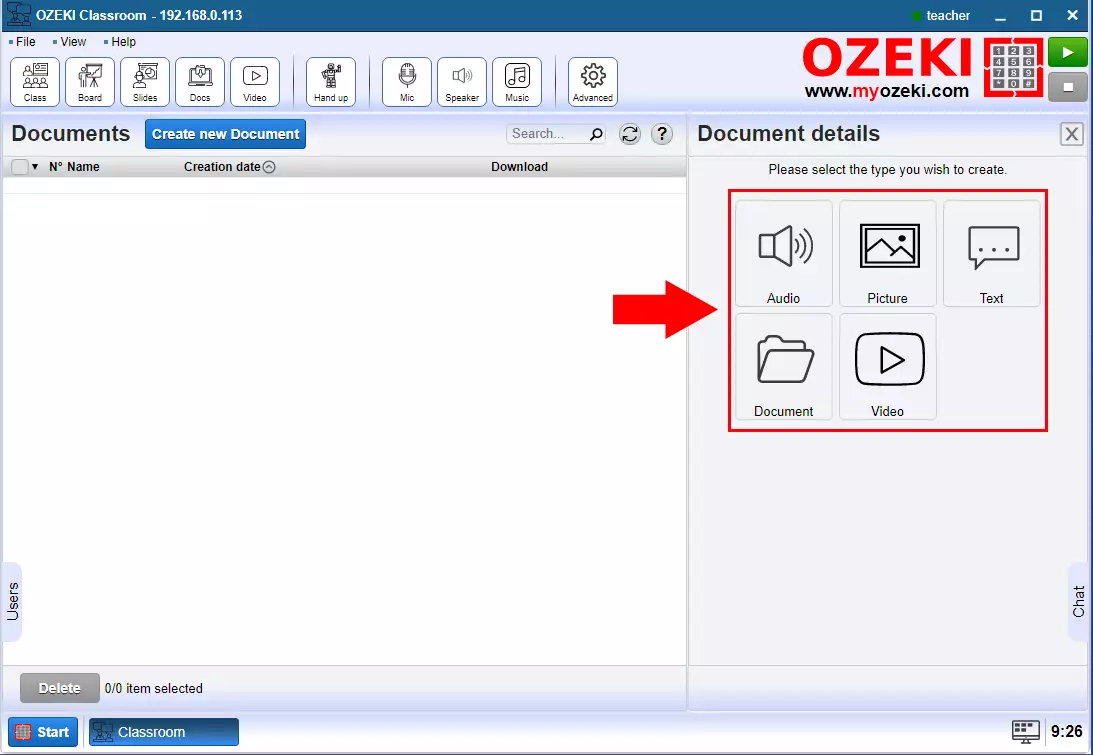
In the Documnets details, select the type you wis to create. You are able to upload Audio, Picture, Text, Video or any other Document (Figure 2). Now we are going to upload a PDF so we choose the Document option.

Step 3 - Upload document file
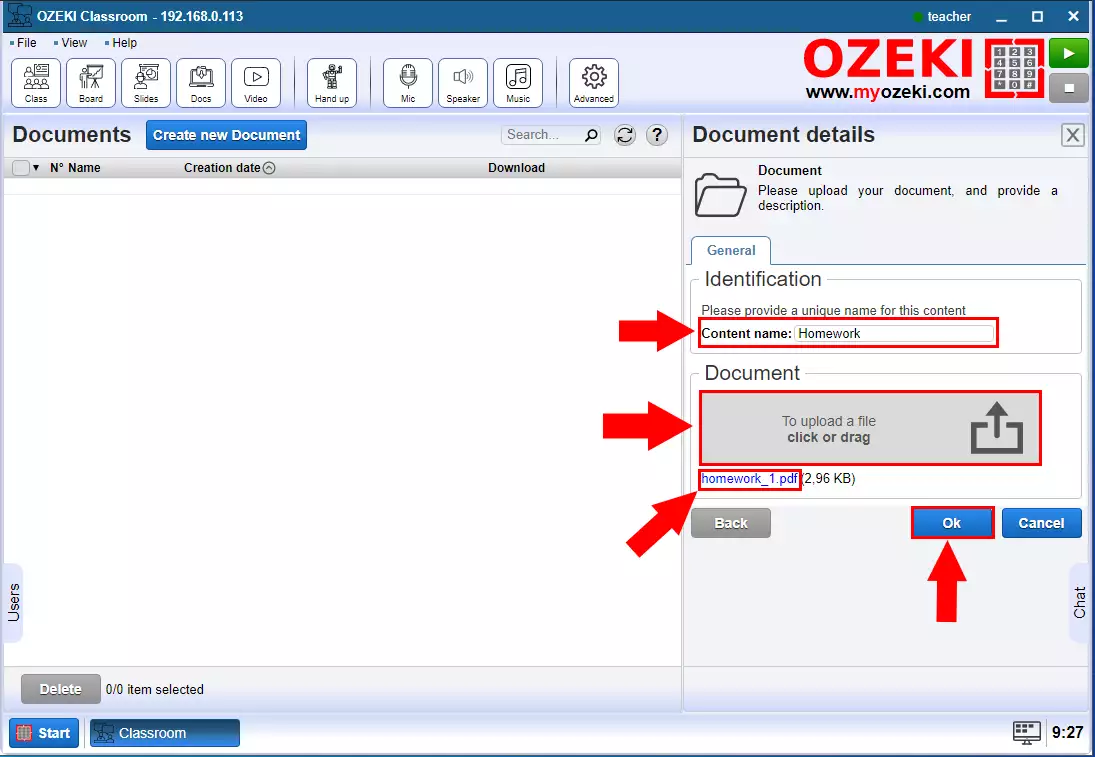
To upload a file drag it to the upload box or click it and browse the file from the filebrowser. If the file is uploaded you will see that name under the upload box. Provide a unique name for the file and then click on the OK button (Figure 3).

Step 4 - Download file
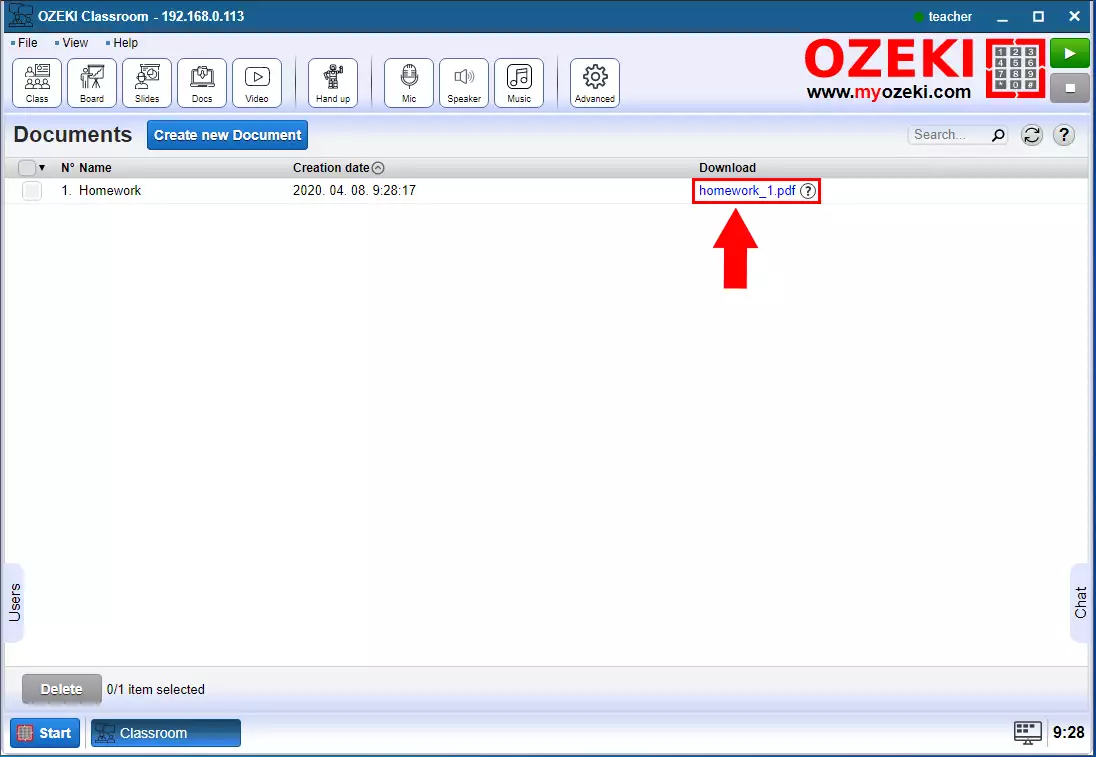
If the upload is successful, the file will appear in the Documents menu. Click on the file name to download it (Figure 4).

