Arduino Uno Switch Controller Control Code
Switch controllers can be used to turn devices on or off. They can operate a relay, or they can generate PWM signal. The On/off state can be used to turn on or turn off devices through relays, the PWM signal can be used to adjust the signal level, for example you can set the brightness of a LED or control the speed of a motor. You can learn more about PWM on the Internet. PWM in Ozeki can be adjusted in absolute numbers or as a percentage.

|
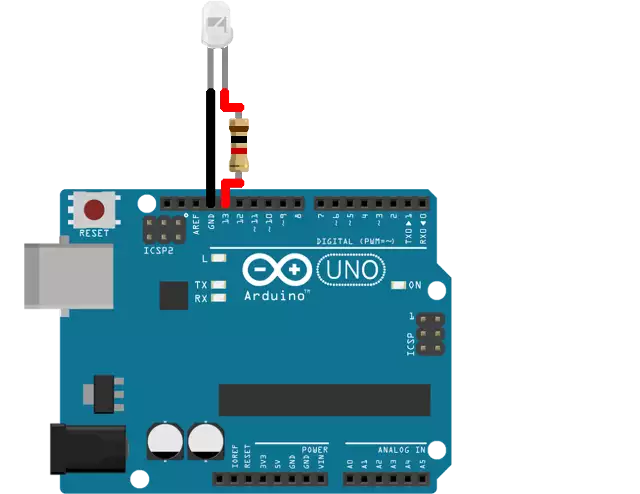
Required hardware
- Arduino Uno
- A device connected to a digital (or pwm) output
Source code to install on controller
Before you upload this code to your Arduino, please format the EEPROM...
#include <OzIDManager.h>
#include <OzSwitchController.h>

OzIDManager* manager;
OzSwitchController* switchController;

const int switchPin = 13;  //Default value: 13

void setup()
{
  Serial.begin(115200);

  manager = new OzIDManager;
  manager->_sendACK = true;
  manager->_checksum = true;

  OzCommunication::setIDManager(manager);

  switchController = new OzSwitchController(switchPin);

  int x=1;
  manager->sendLinkSetup();
  manager->PrintWelcomeLine(switchController, x++, "MySwitch");
}

void loop()
{
  OzCommunication::communicate();
}