Quick Start Guide
This guide provides you detailed information about how to setup your Ozeki Android SMPP SMS Gateway quickly. In order to install an SMPP connection you need an SMPP SMS Gateway application on your Android Mobile Phone and an Ozeki NG SMS Gateway installed on a Windows PC.

Figure 1 - Prerequisites
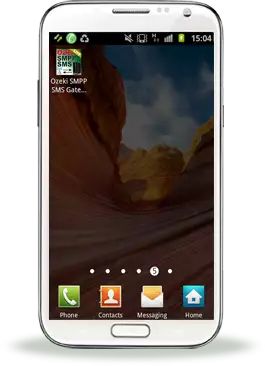
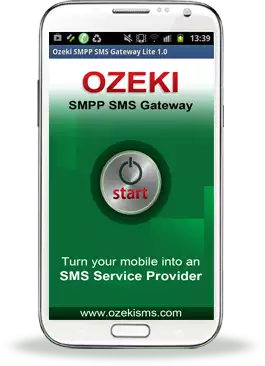
Step 1. - Install Android SMPP gateway on your smartphone
Download, install and configure the application
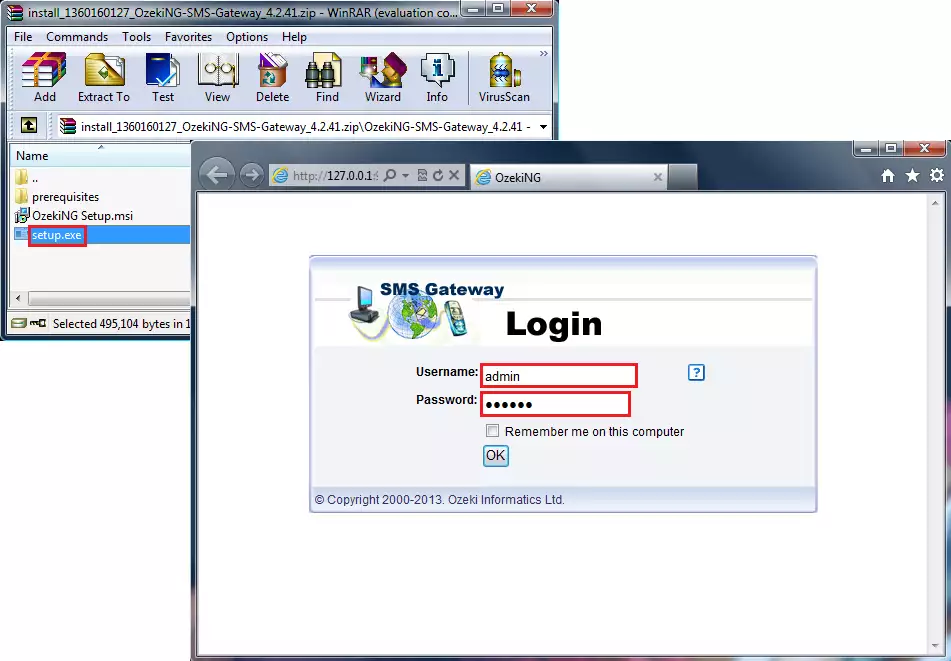
Figure 2 - Ozeki Android SMPP SMS Gateway has been installed Step 2. - Install Ozeki NG SMS Gateway on your Windows PC How to install Ozeki NG SMS Gateway You can download Ozeki NG SMS Gateway directly from Ozeki. After you have dowloaded the software, you need to install it. First, open Ozeki NG SMS Gateway installation file, then run the setup.exe file (Figure 3). You can find a detailed step-by-step installation guide for Ozeki NG SMS Gateway on the following page: How to install Ozeki NG SMS Gateway Login You can login to the user interface (the management console) by entering your user name and password (Figure 3). If you need assistance for login, please take a look at Ozeki NG SMS Gateway Quick Start Guide. For an overview about how to use it, check out the User Guide.
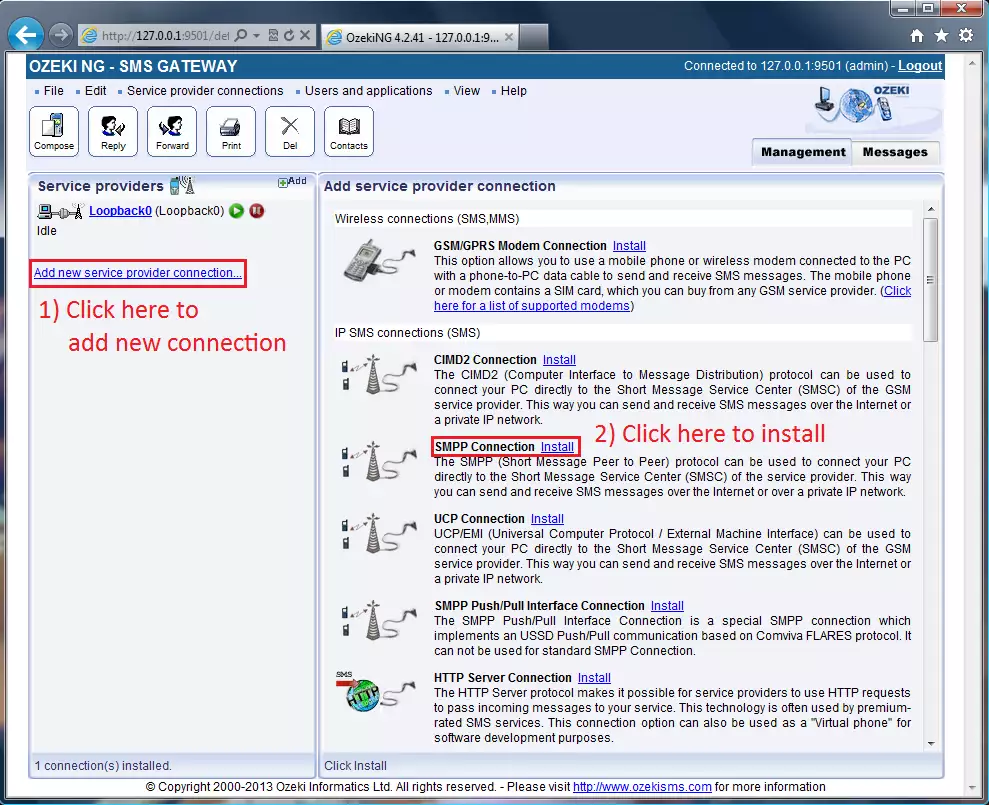
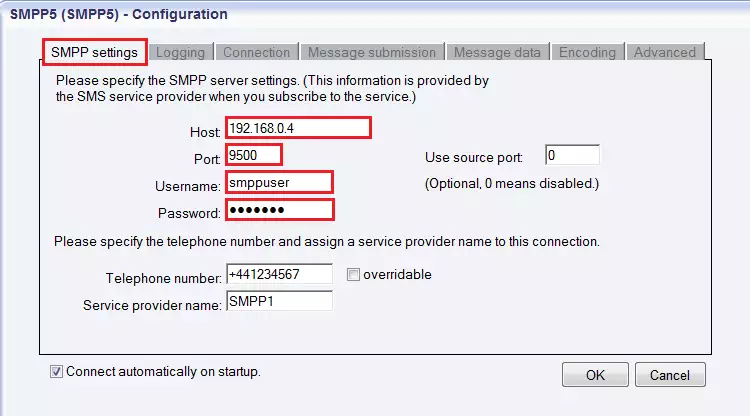
Step 3. - Setup Ozeki NG to use your Android phone Configuration in Ozeki NG SMS Gateway Now you need to install and configure SMPP (Short Message Peer-to-Peer) connection. Firstly, add new service provider connection by selecting and clicking on "Add new service provider connection" textlink. After this the "Add service provider panel" will appear on the right side of the GUI. Look for "SMPP Connection", then click on "Install" to select the SMPP protocol (Figure 4).
Now the SMPP Configuration panel appears on the right side of the interface. It contains 7 tabs. You can find a detailed step-by-step installation guide about configuration on the following page: How to setup Ozeki Android SMPP SMS Gateway for Ozeki NG SMS Gateway The main steps in brief:
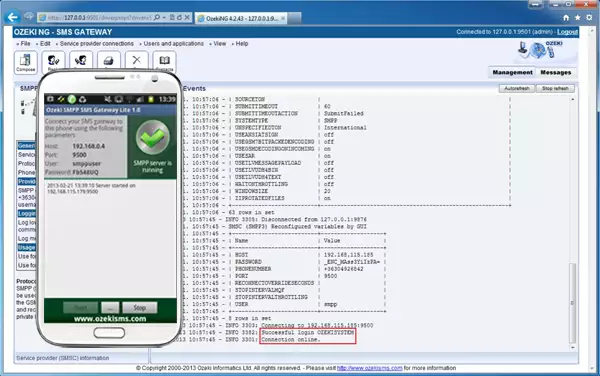
In the left side of the screen click on Events. The "Successful login" and "Connection online" messages in the Events panel indicate that the SMPP connection has been installed successfully (Figure 6).
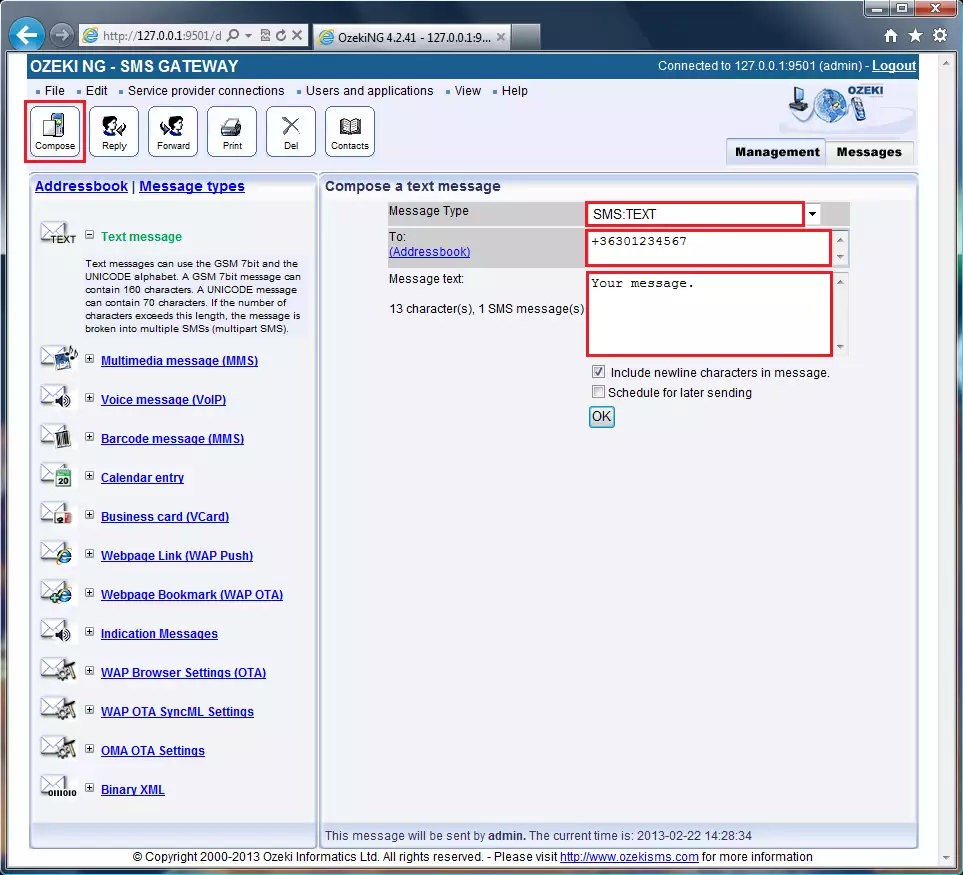
Step 4. - Send your first SMS In order to compose and send SMS message, click on the "Compose" button in toolbar in the top left-hand of the screen. After clicking it, you can choose Message type or you can check the Addressbook in the left side of the screen and in the right part the Compose a text message panel will appear. (Figure 7). After selecting the appropriate message type (in Figure 7 "Text message"), on the right side of the screen you need to select subtype. Than enter the recipient phone number in international format (starting with "+") in the To (Addressbook) edit box. Finally, compose the message in the Message text edit box. Next to the Message text box there is a character counter, which shows that your SMS message will be sent as one or more messages. Under the Message text box check the first checkbox, if your message includes newline characters. If you want to send your SMS later, check the "Schedule for later sending", than define the date and time of sending. When you are finished, click on "OK" button.
| |